Back to Learning Center
Staff & Duty Roster
Add professionals, assign permissions, and manage schedules and payroll settings.
Adding a Professional
1
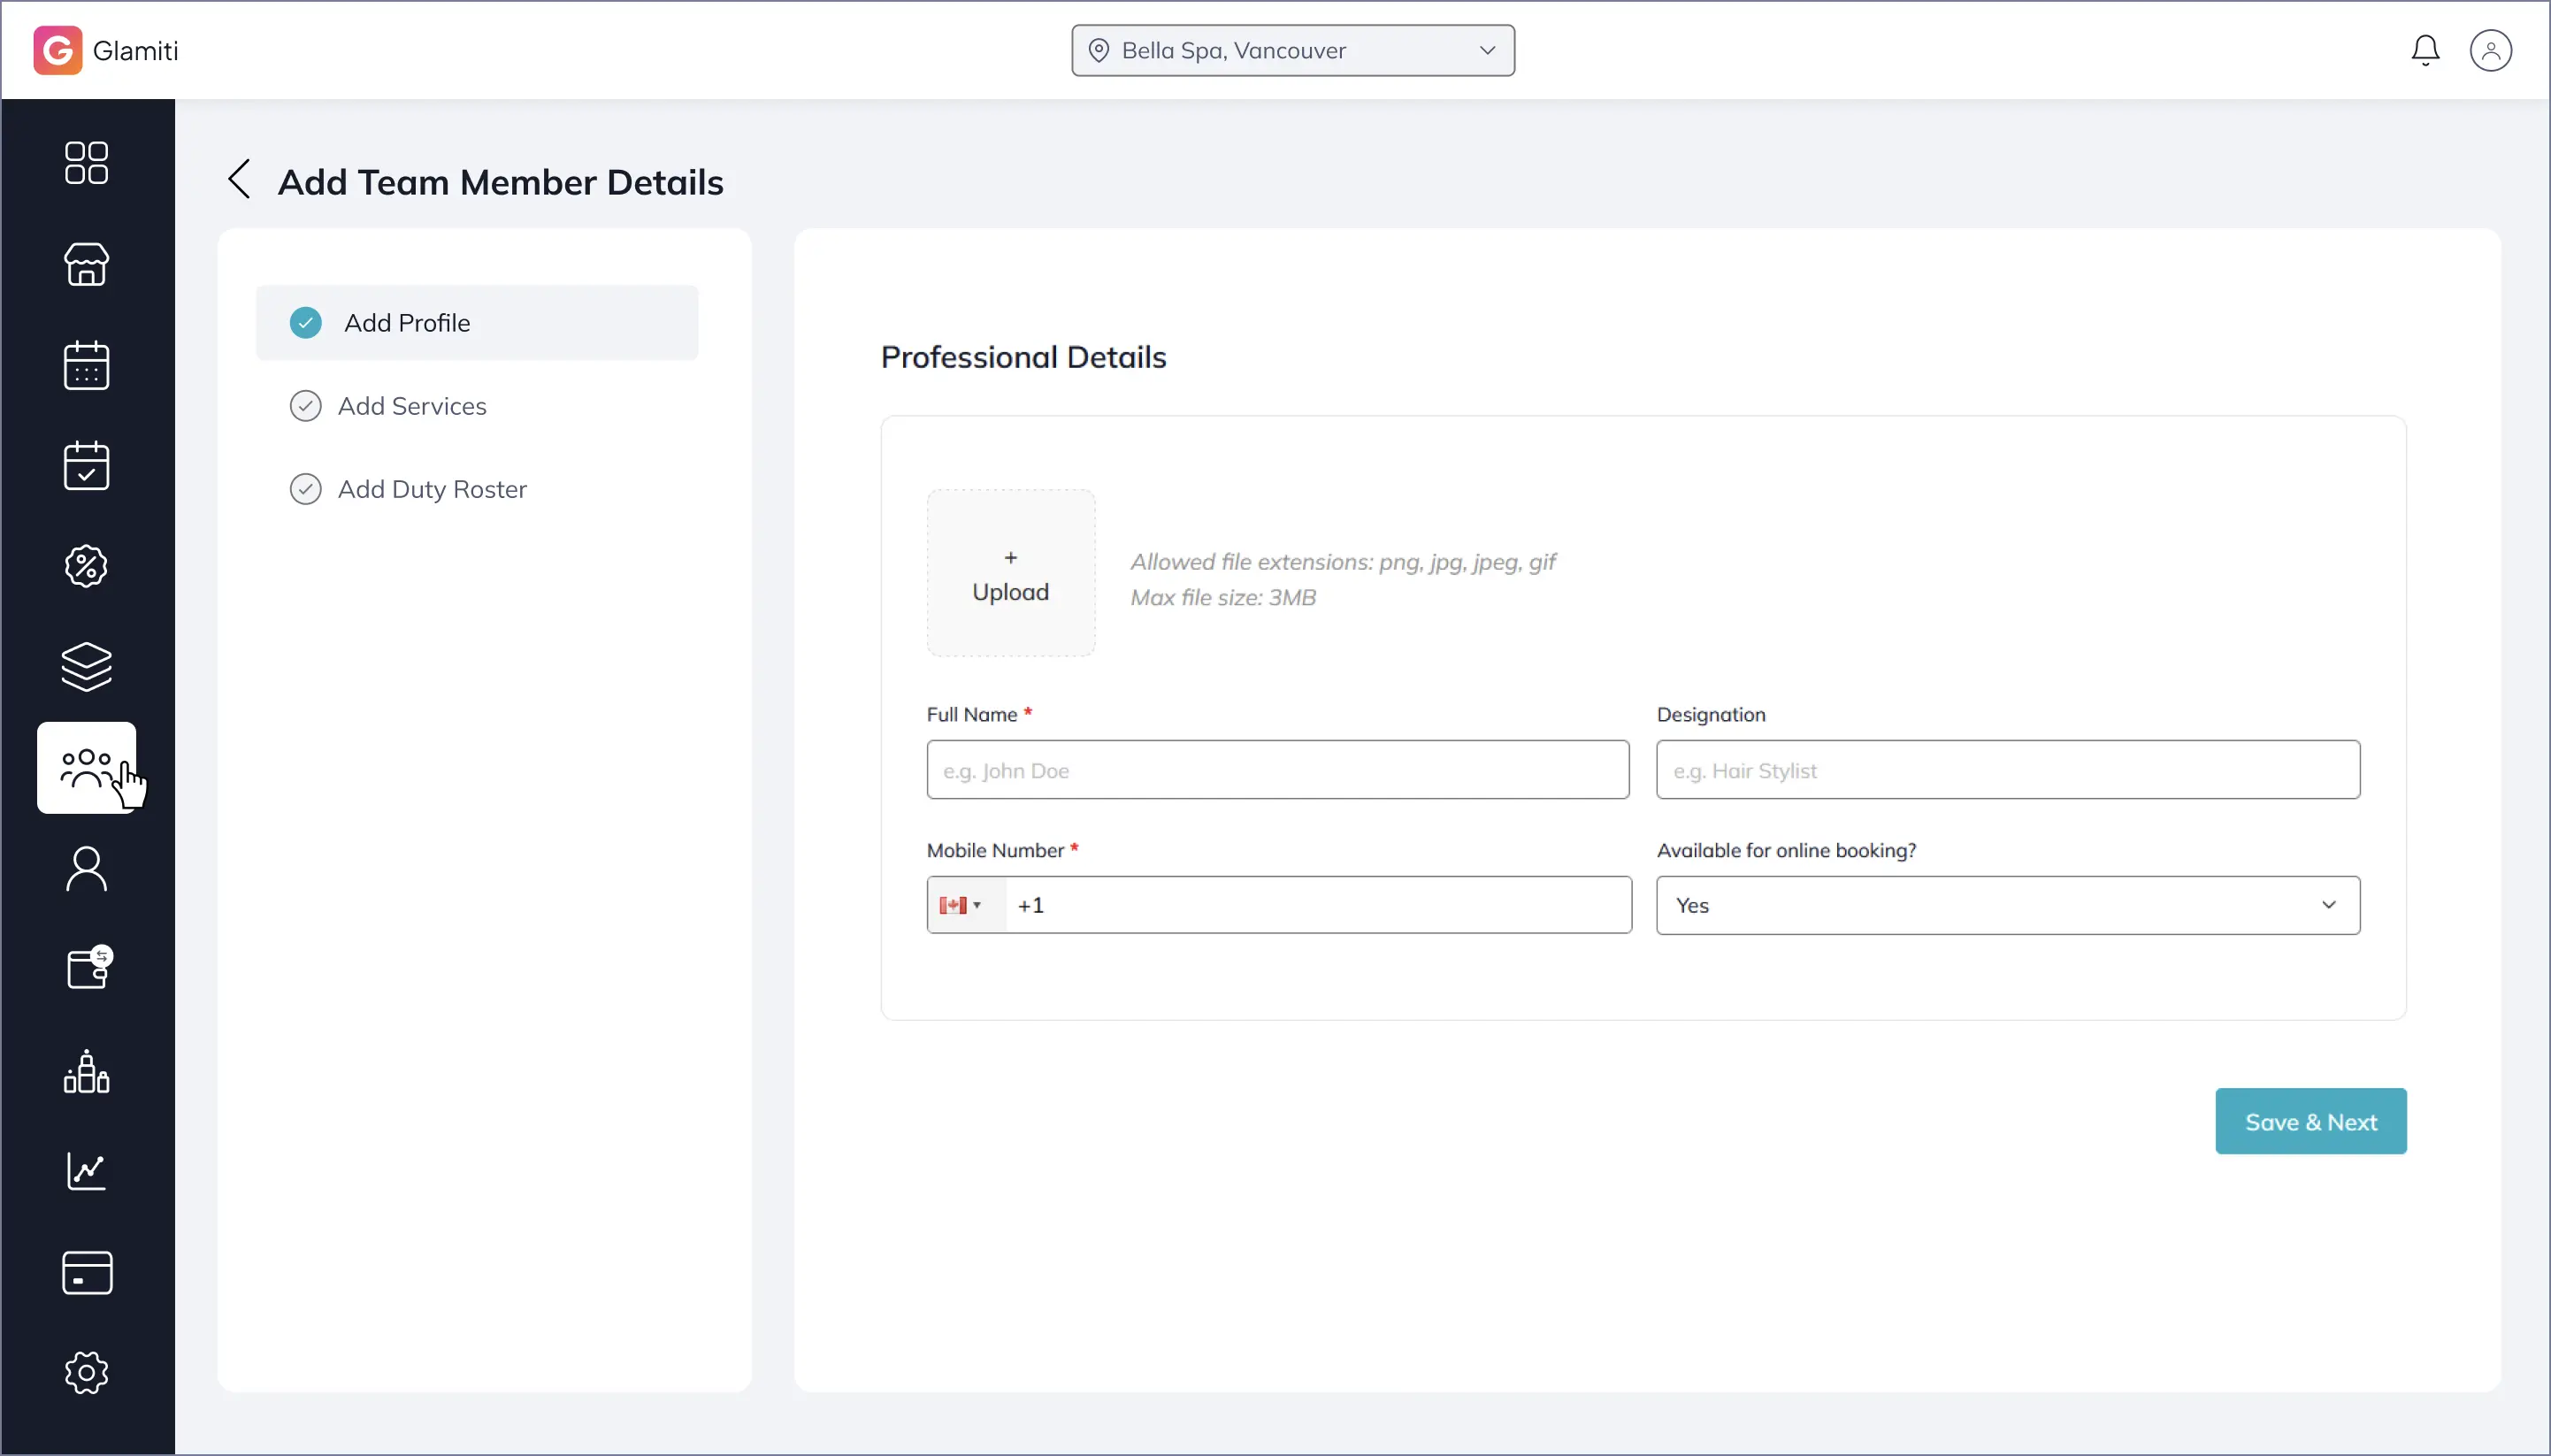
Step 1: Add Profile
•
Upload a profile image (optional).
•
Enter the team member's name and title.
•
Enter their phone number.
•
Enter their email address (required if the professional will manage their own bookings).
•
Select whether they are available for online bookings.
•
Click "Save & Next".
2
Step 2: Assign Services
•
Assign services to the team member by selecting the relevant checkboxes.
•
(If services have not been added yet, you can assign them later.)
•
Click "Save & Next".
3
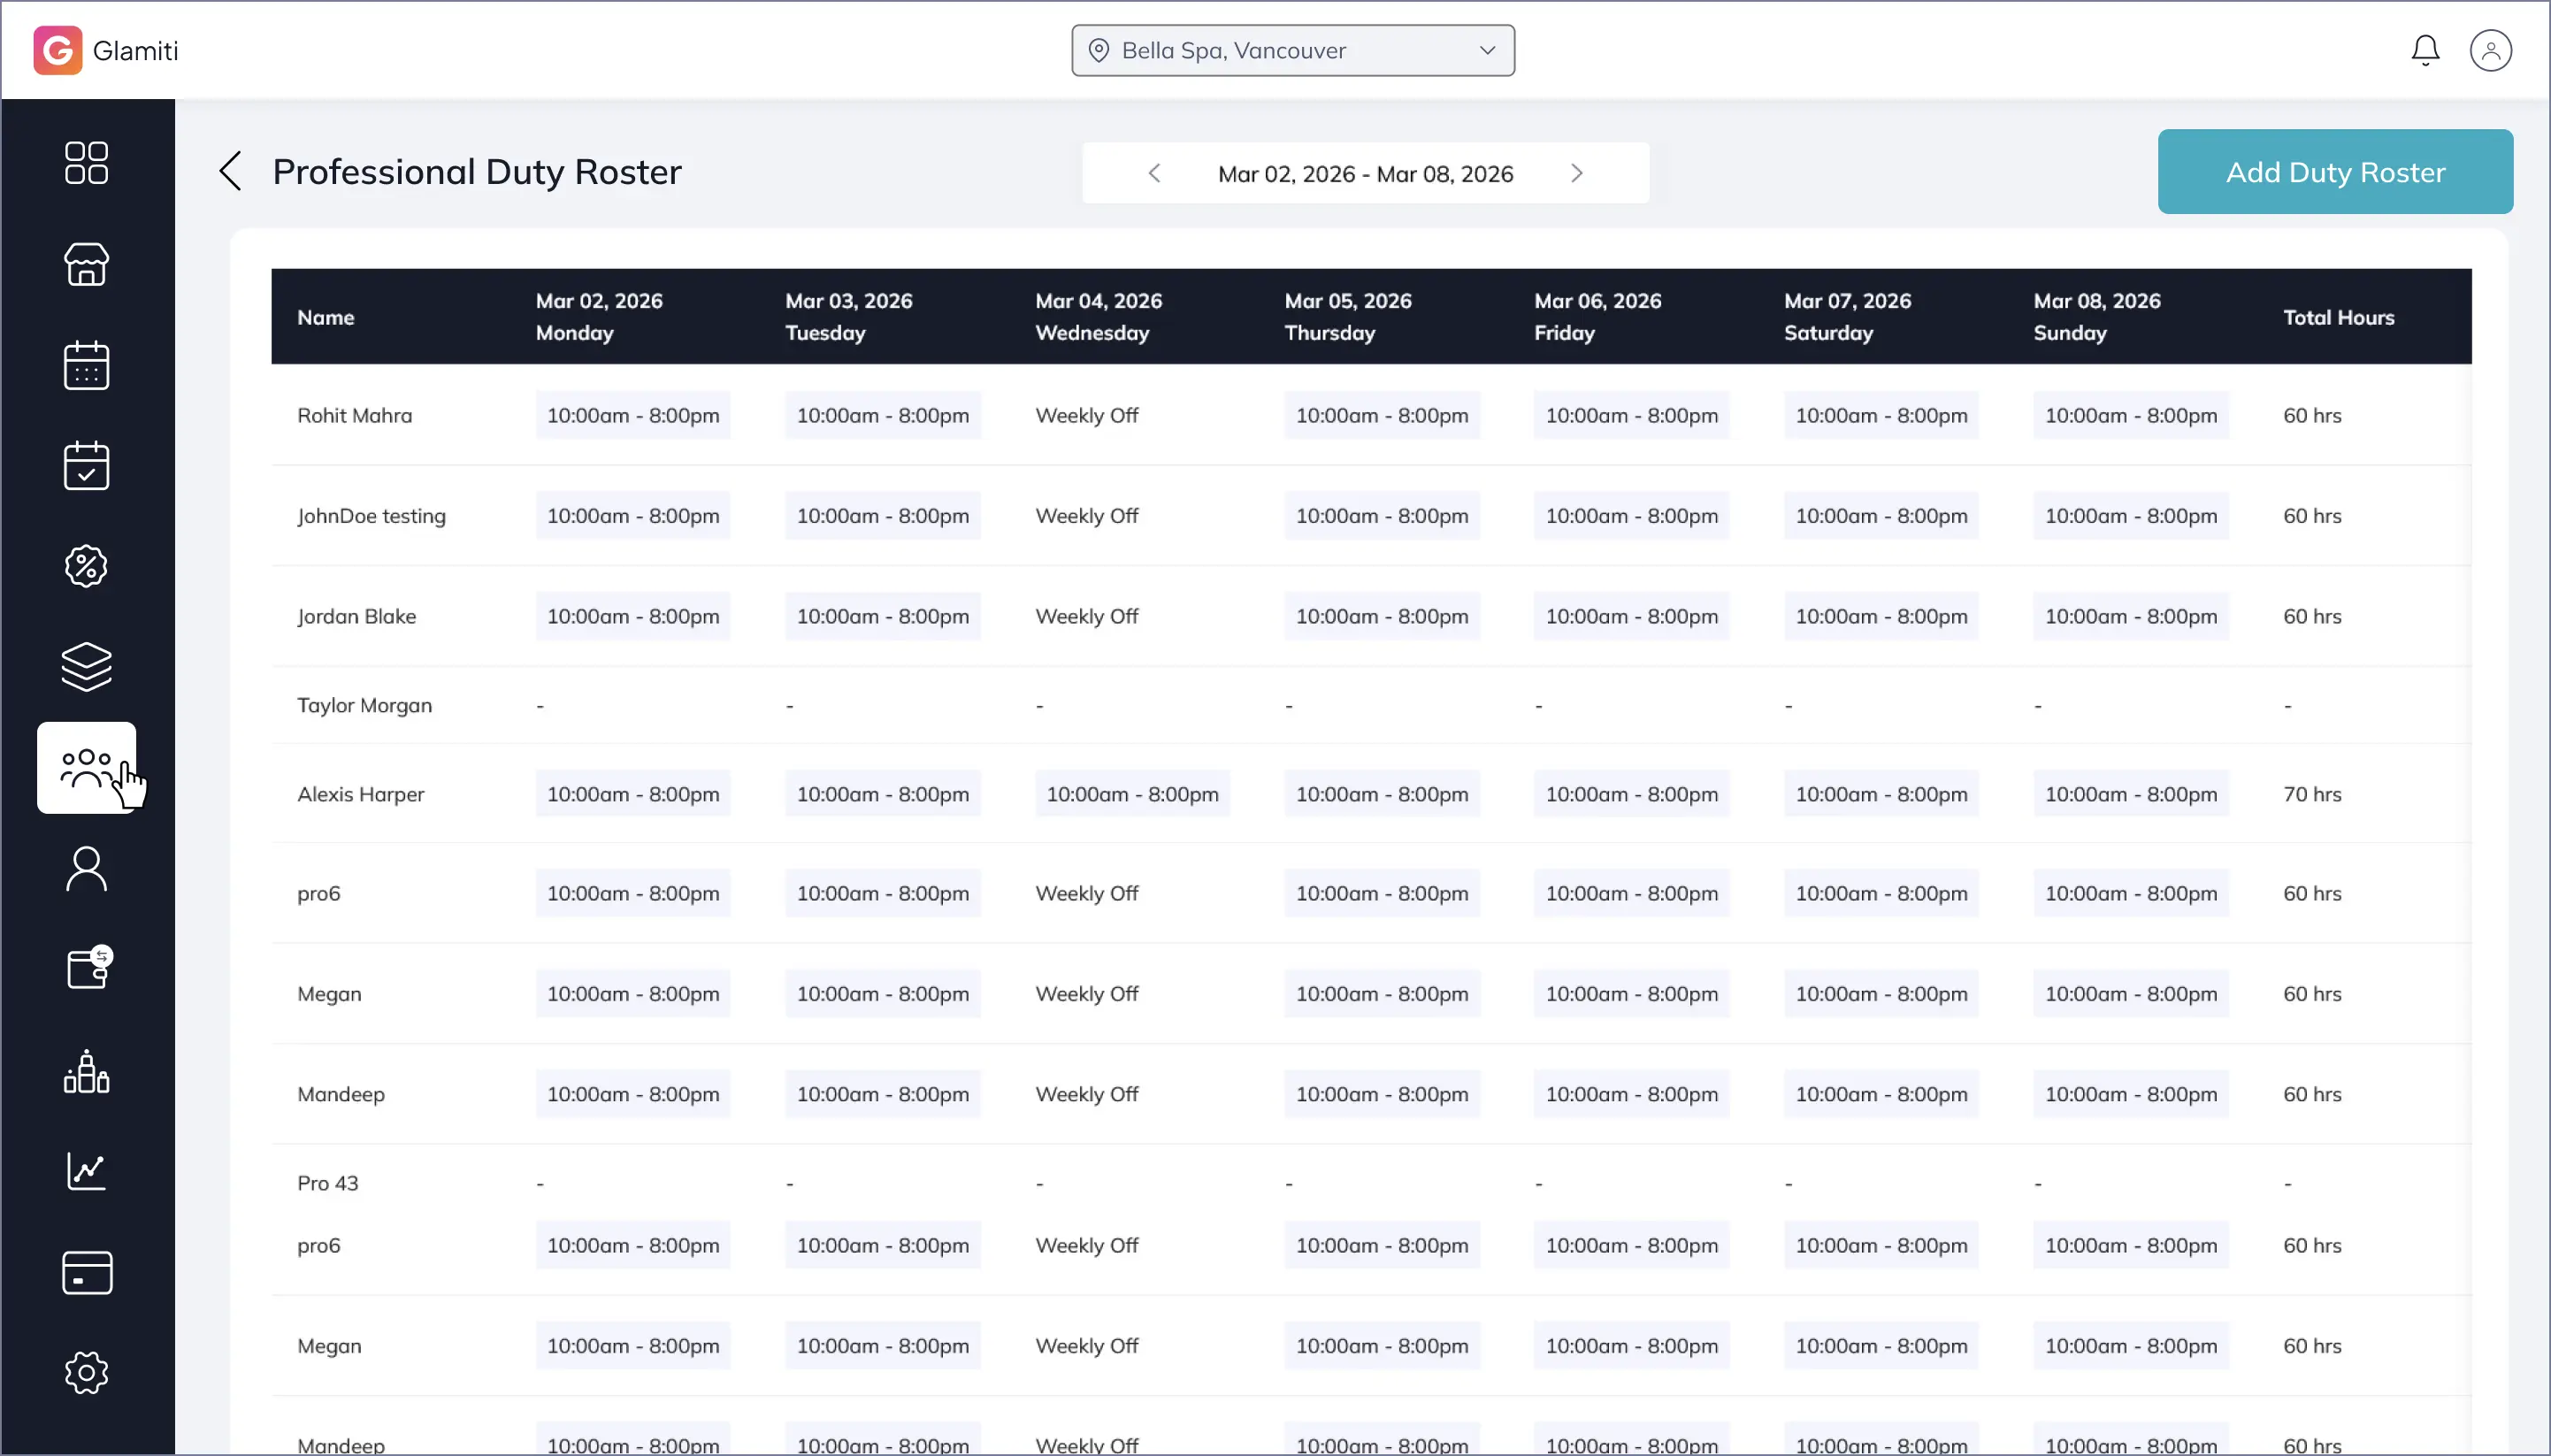
Step 3: Set Duty Roster
•
Select the start date and end date.
•
Choose the weekly off day.
•
Set the working hours for each day.
•
Click "Save & Next"
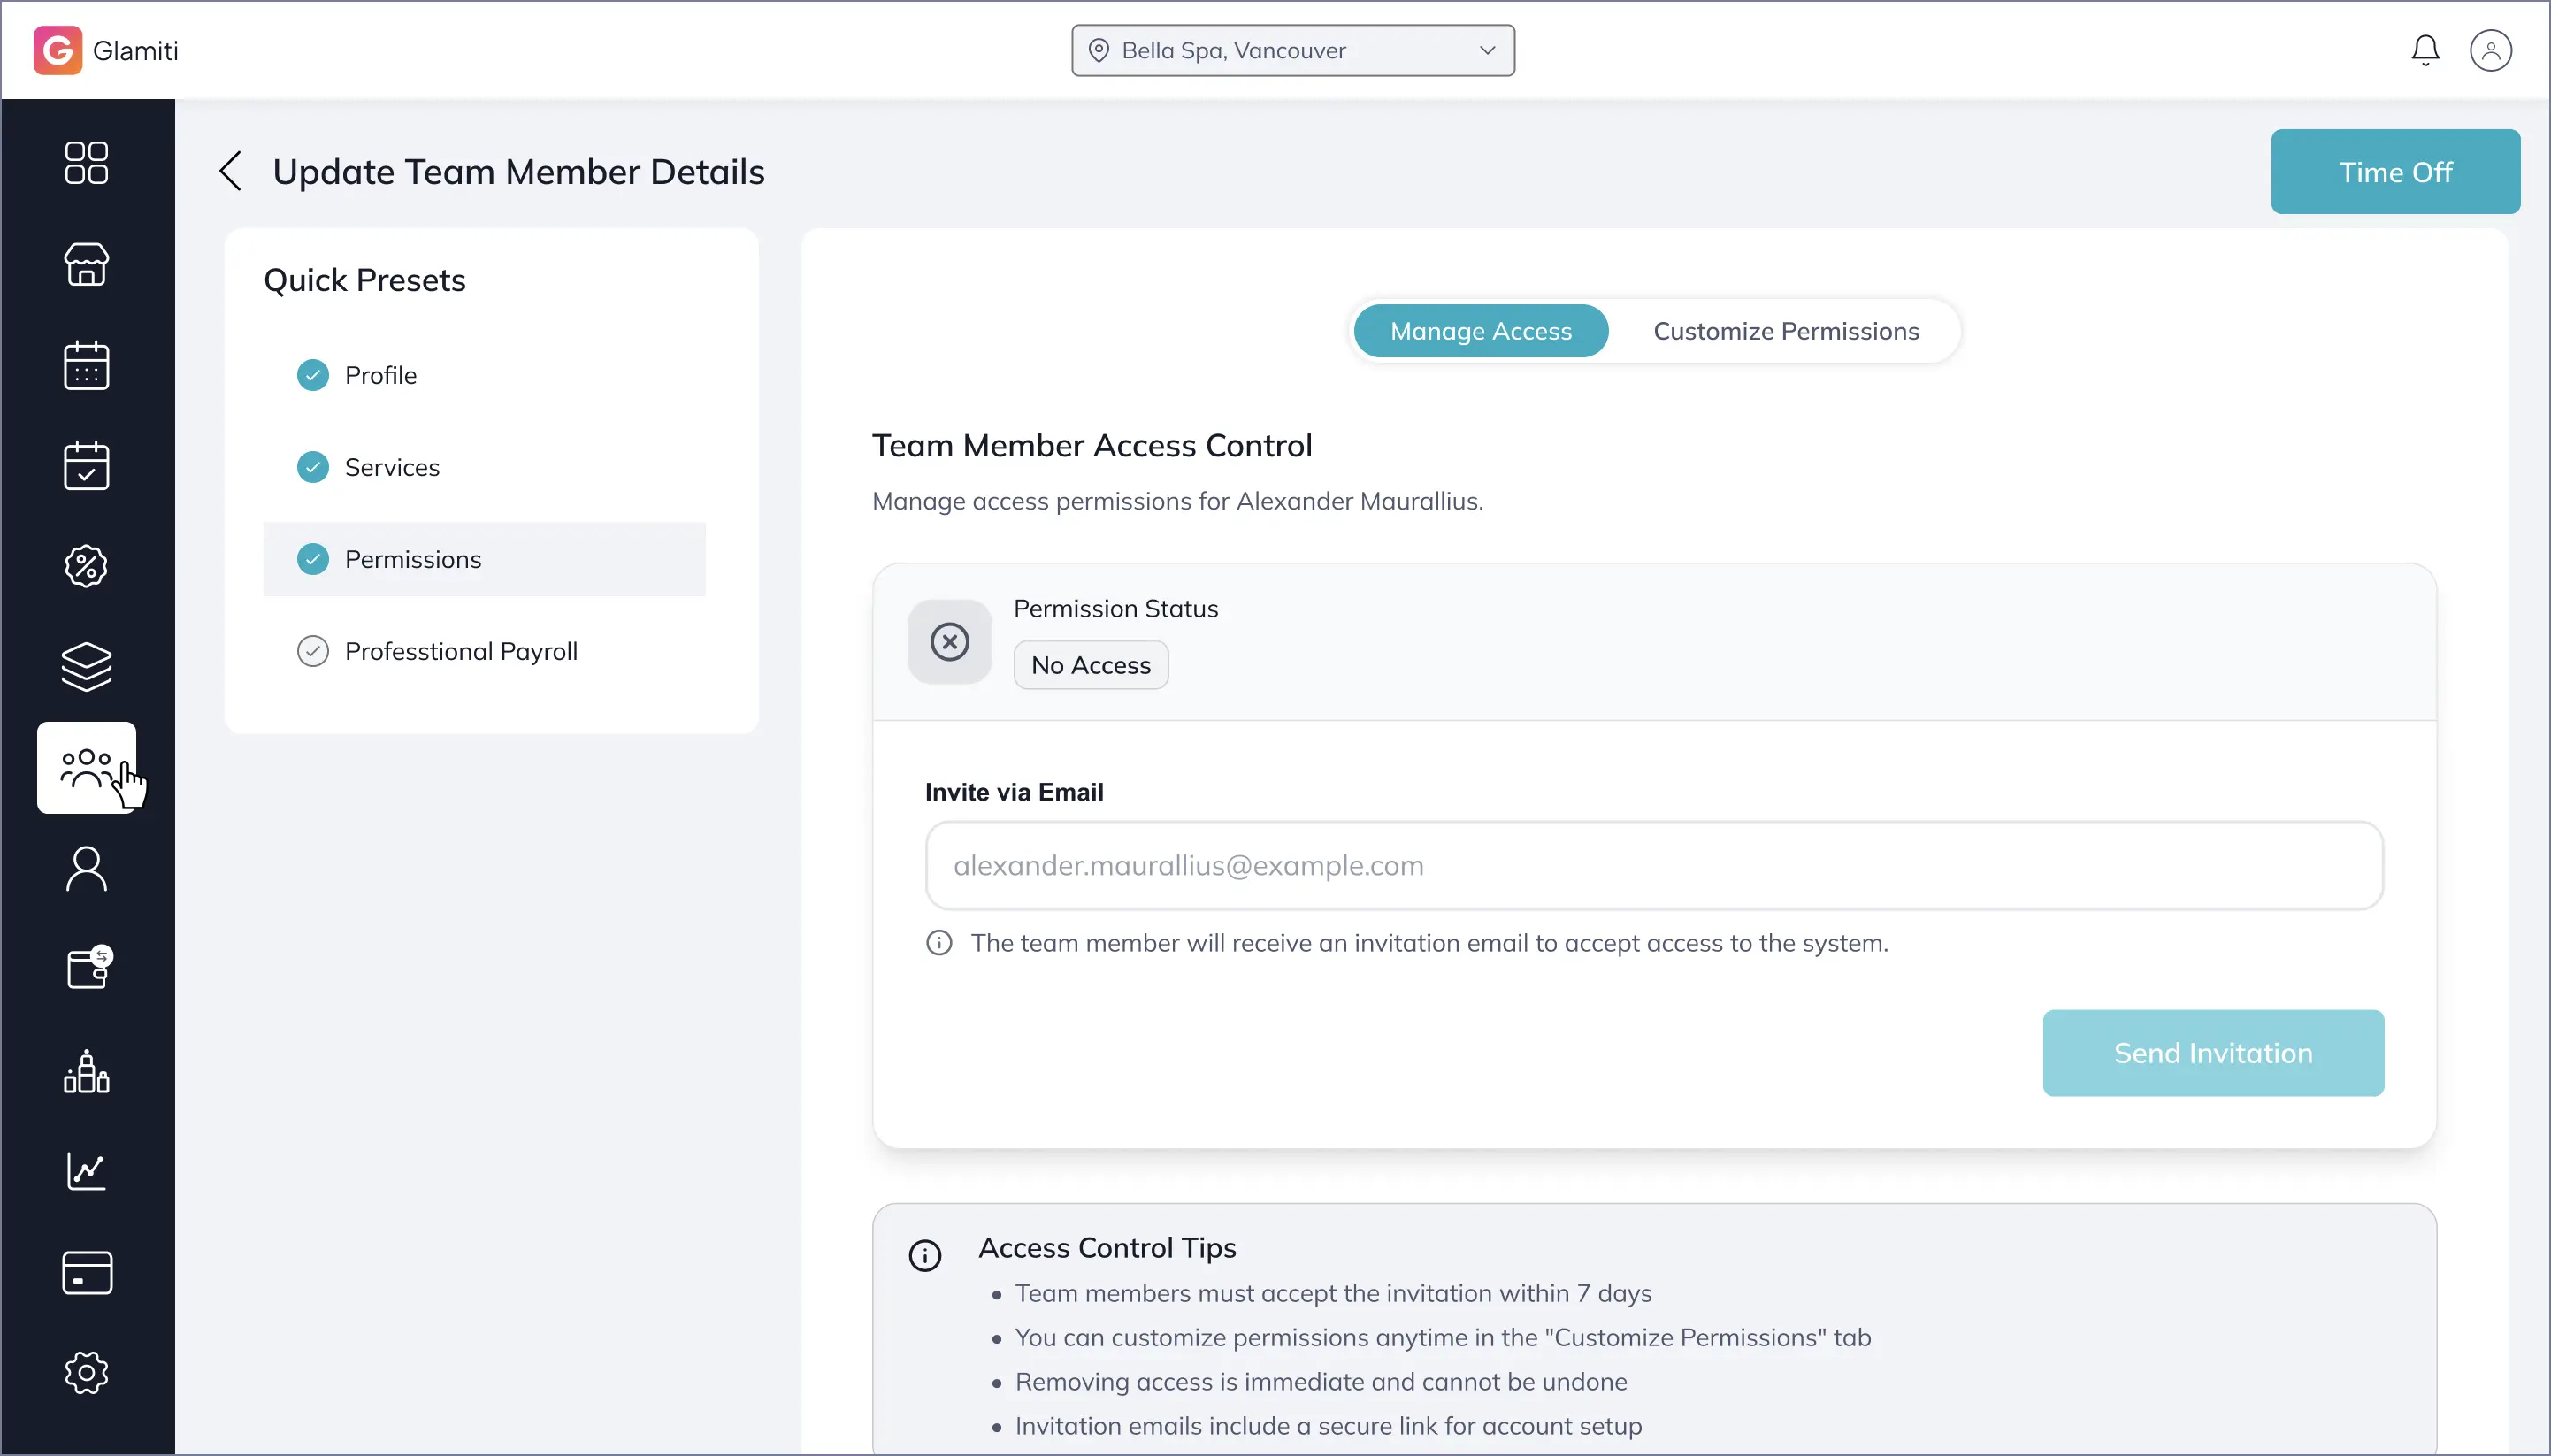
Set Permission
•
First, add the professional's email ID to share separate login details.
•
Permission statuses include:
•
No Access
•
Pending
•
Access Granted
•
These statuses help identify which professionals have access.
•
What Happens on Saving?
If the Professional Exceeds the Plan Limit:
•
•
◦
Be booked for walk-in or online appointments.
◦
Be assigned to sales or quick sales.
◦
Have their account activated.
•
Professional Access & Permissions:
•
If an email was provided, an account activation email is sent.
•
The owner can modify permissions anytime. (Changes take effect once the professional logs out and logs back in.)
•
To immediately revoke access, the owner can remove the professional's email and save the changes.
Payroll Settings
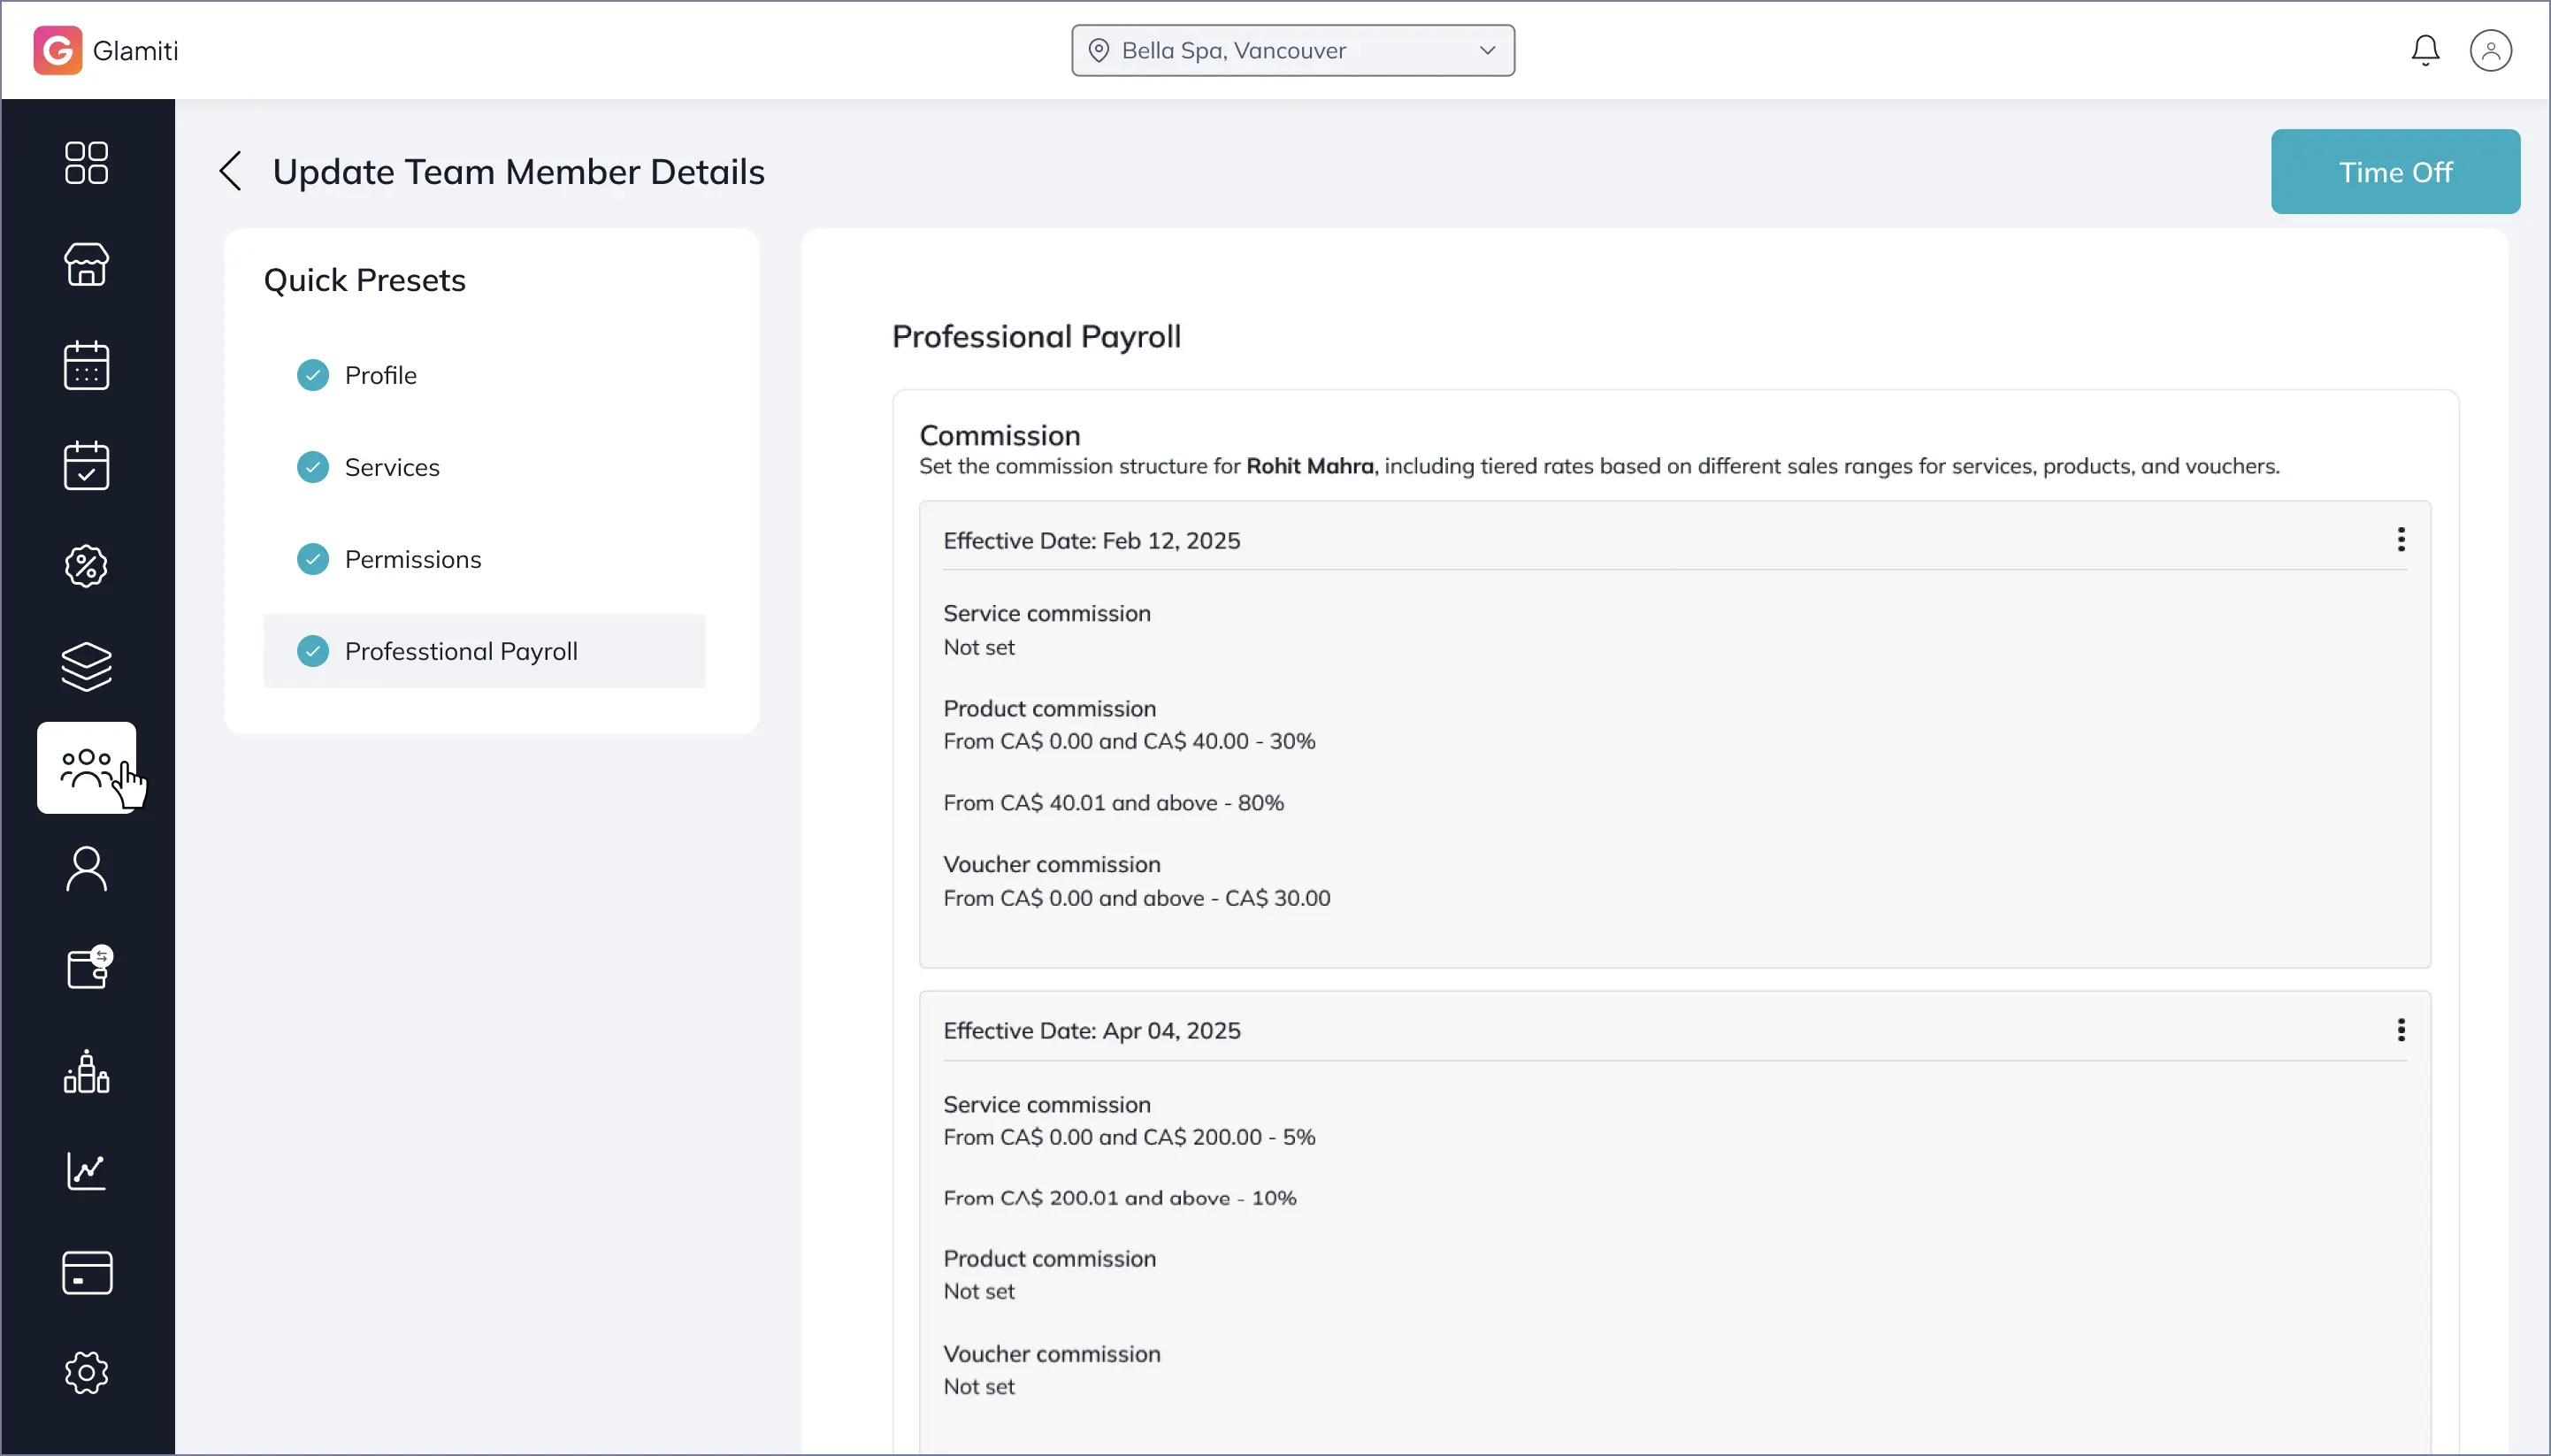
Professional Payroll Management
Set Hourly Rate:
•
•
•
•
Set Commission:
Steps to Set Commission:
1.
Go to the professional listing and select the team member.
2.
Navigate to Professional Payroll and click "Add Commission".
3.
Choose the effective date for commission earnings.
4.
Click "Add Commission" for services, products, or vouchers.
5.
Set the minimum or maximum amount for the commission to apply.
6.
Enter the percentage or cash amount for each sale
7.
To add another commission level, click "Add Commission" and repeat the steps.
8.
Click "Save".
Note: The commission cycle takes effect from the chosen effective date. It is recommended to create a new commission cycle rather than modifying an existing one, as edits may impact past commissions.
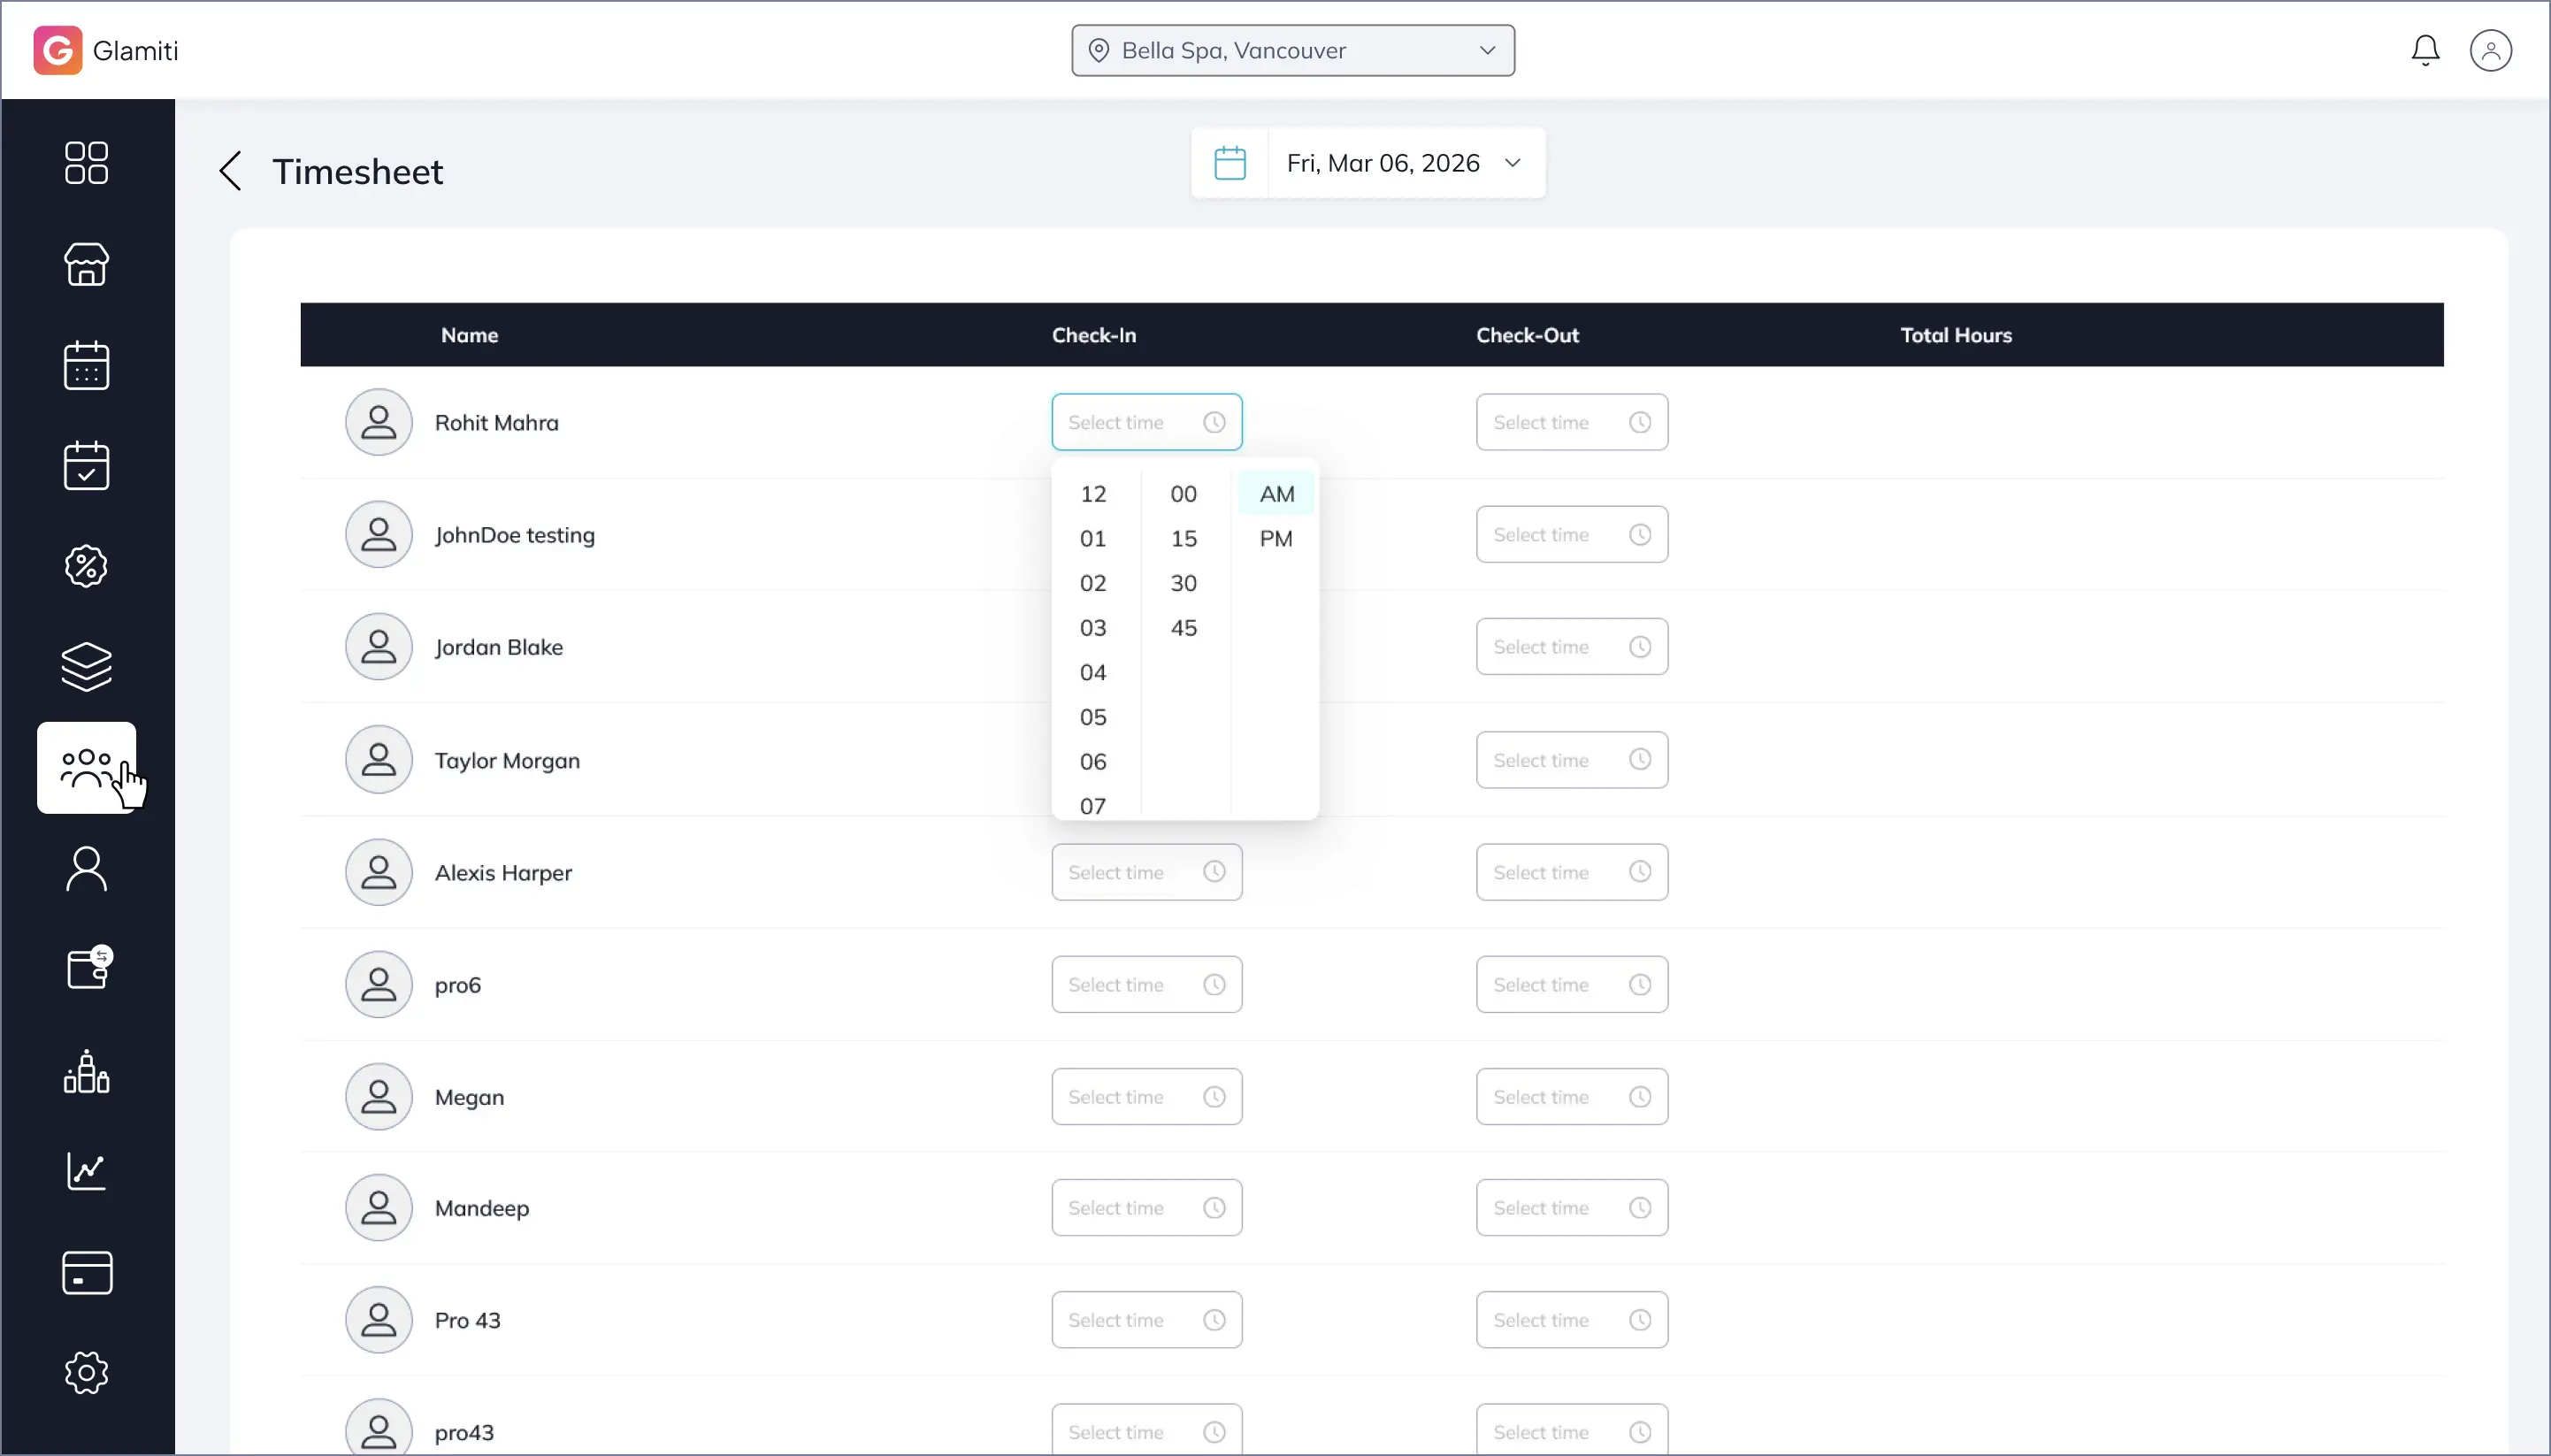
Timesheet Management
•
•
•
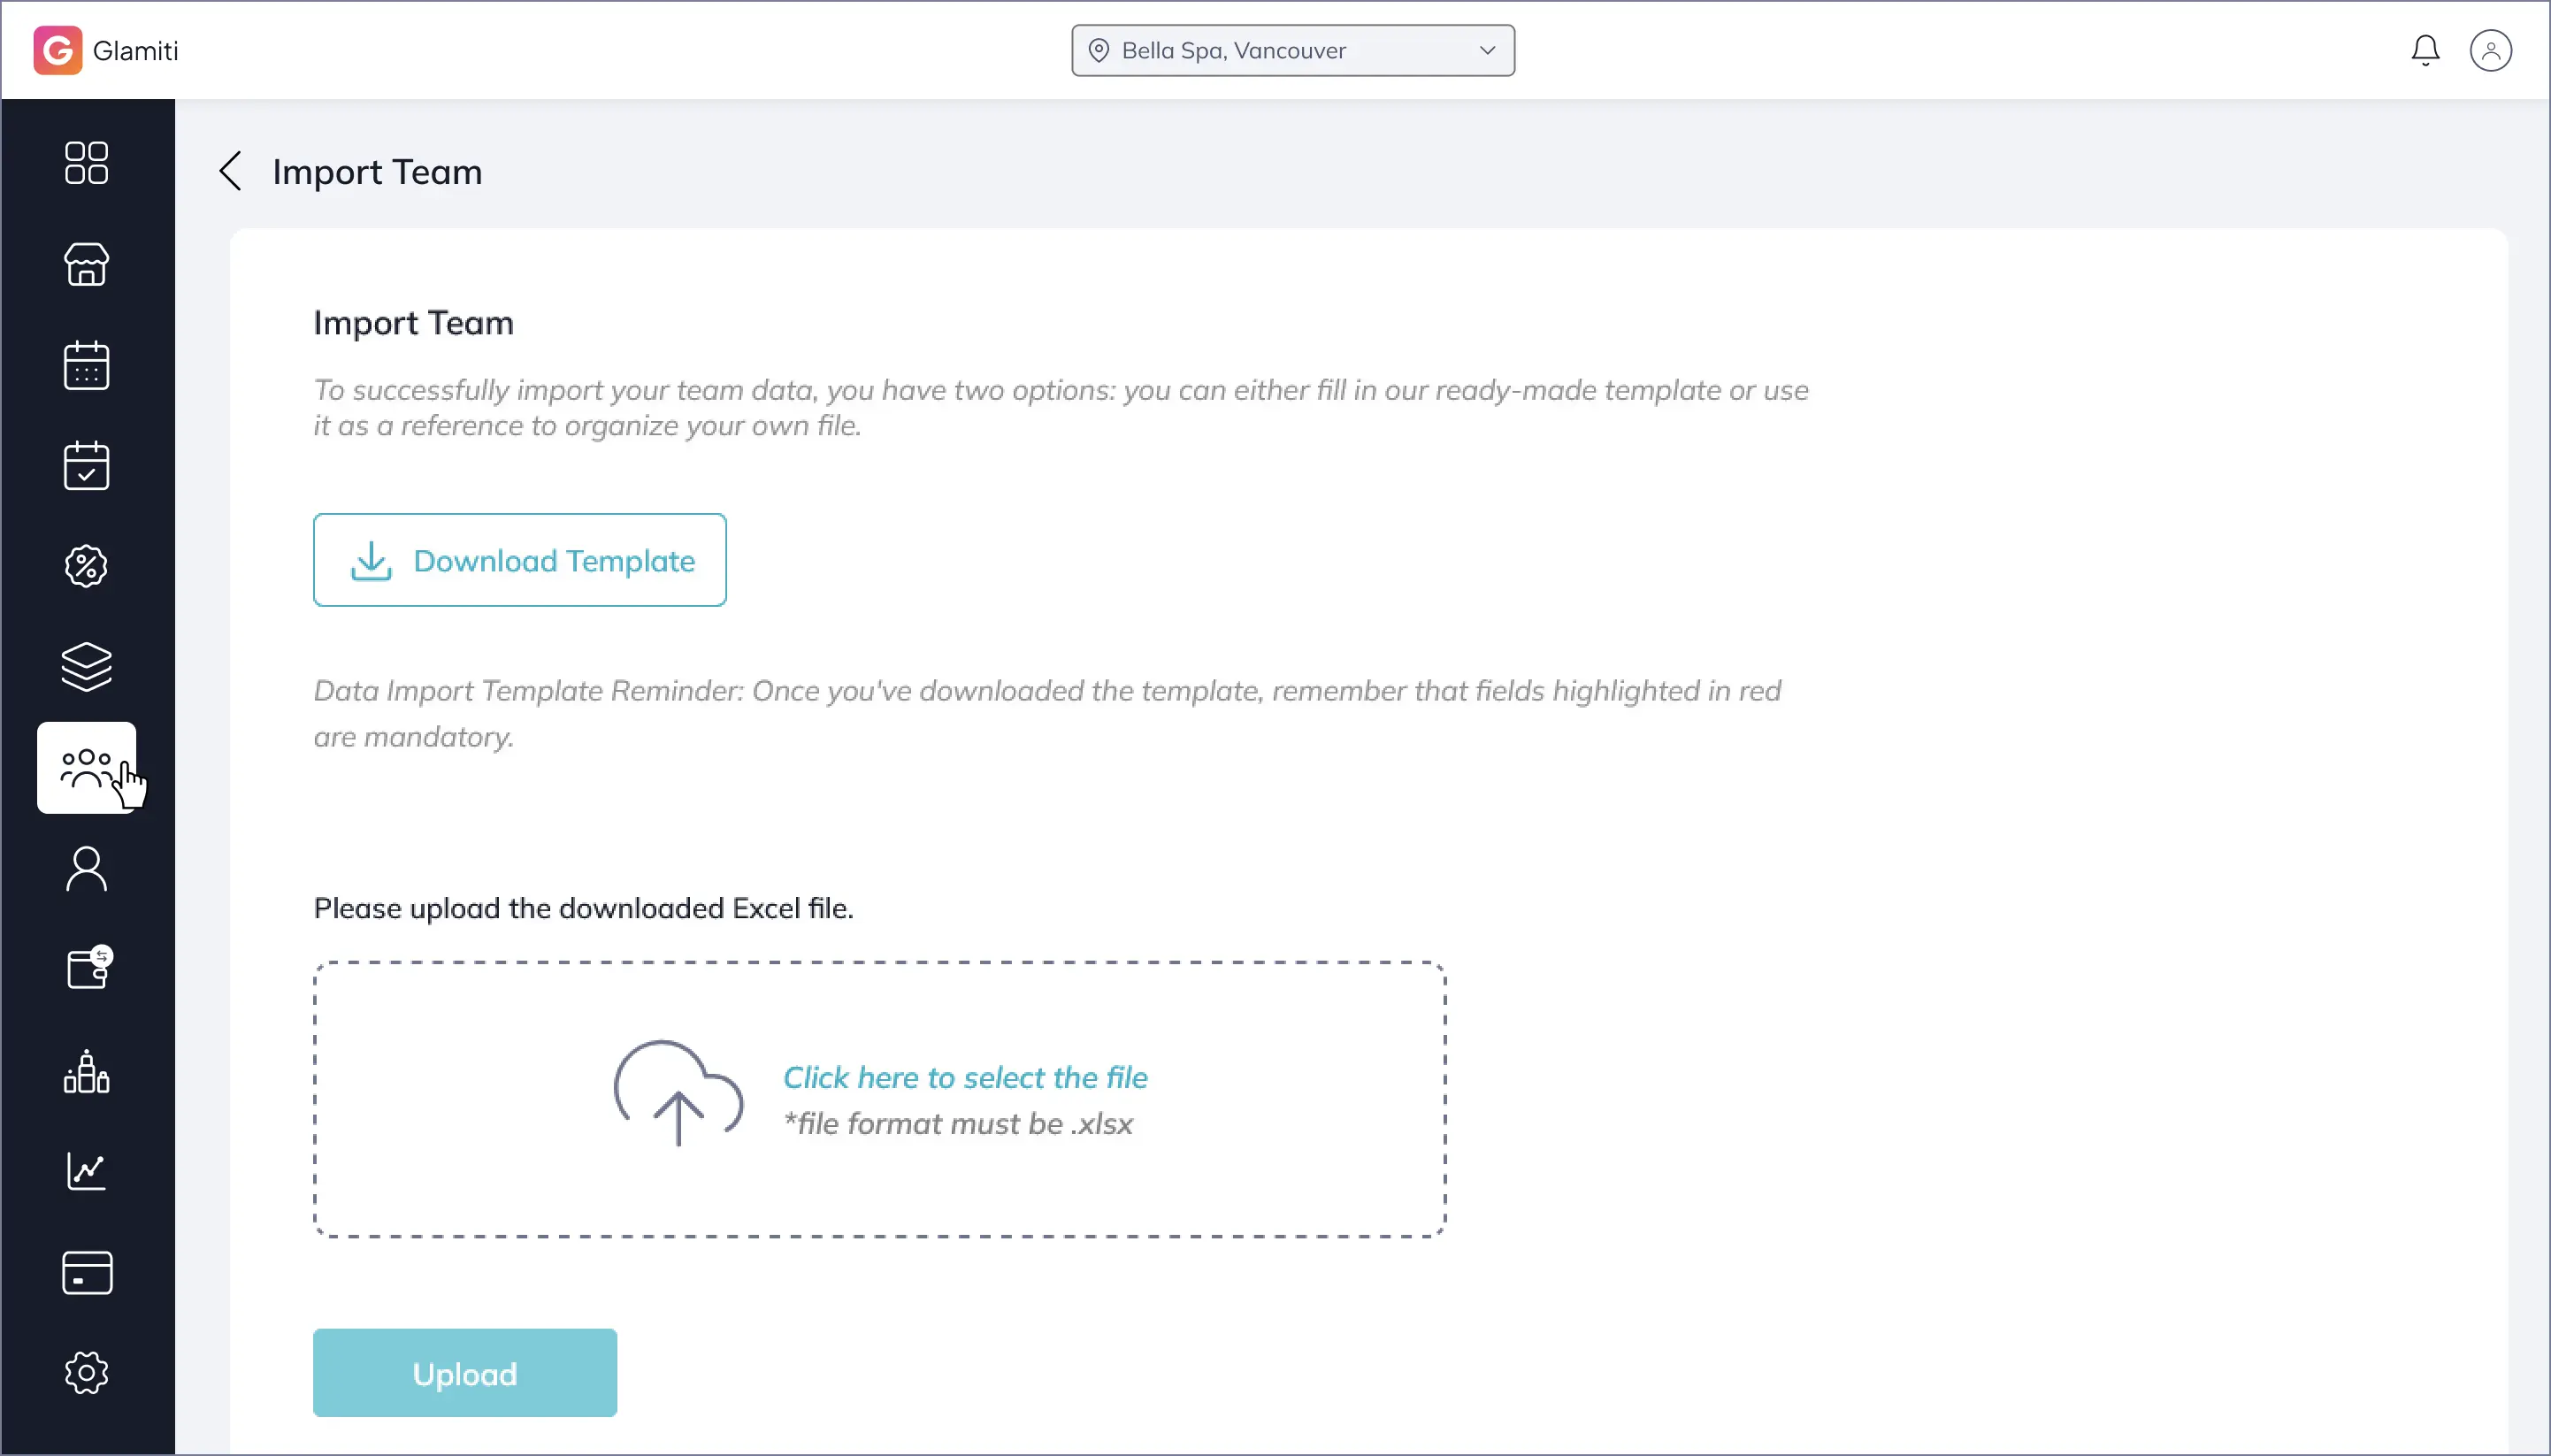
Importing Professionals
•
Going to the Professional Listing Page.
•
Clicking "Import Team".
Managing Duty Roster
Duty rosters for team members are managed separately after adding professionals.
Navigate to the Team Listing Page.
Click "Duty Roster" (top-right corner).
Select a professional and update their duty roster.