Back to Learning Center
Payment Methods & Checkout
Glamiti provides multiple options to add tips and accept payments seamlessly.
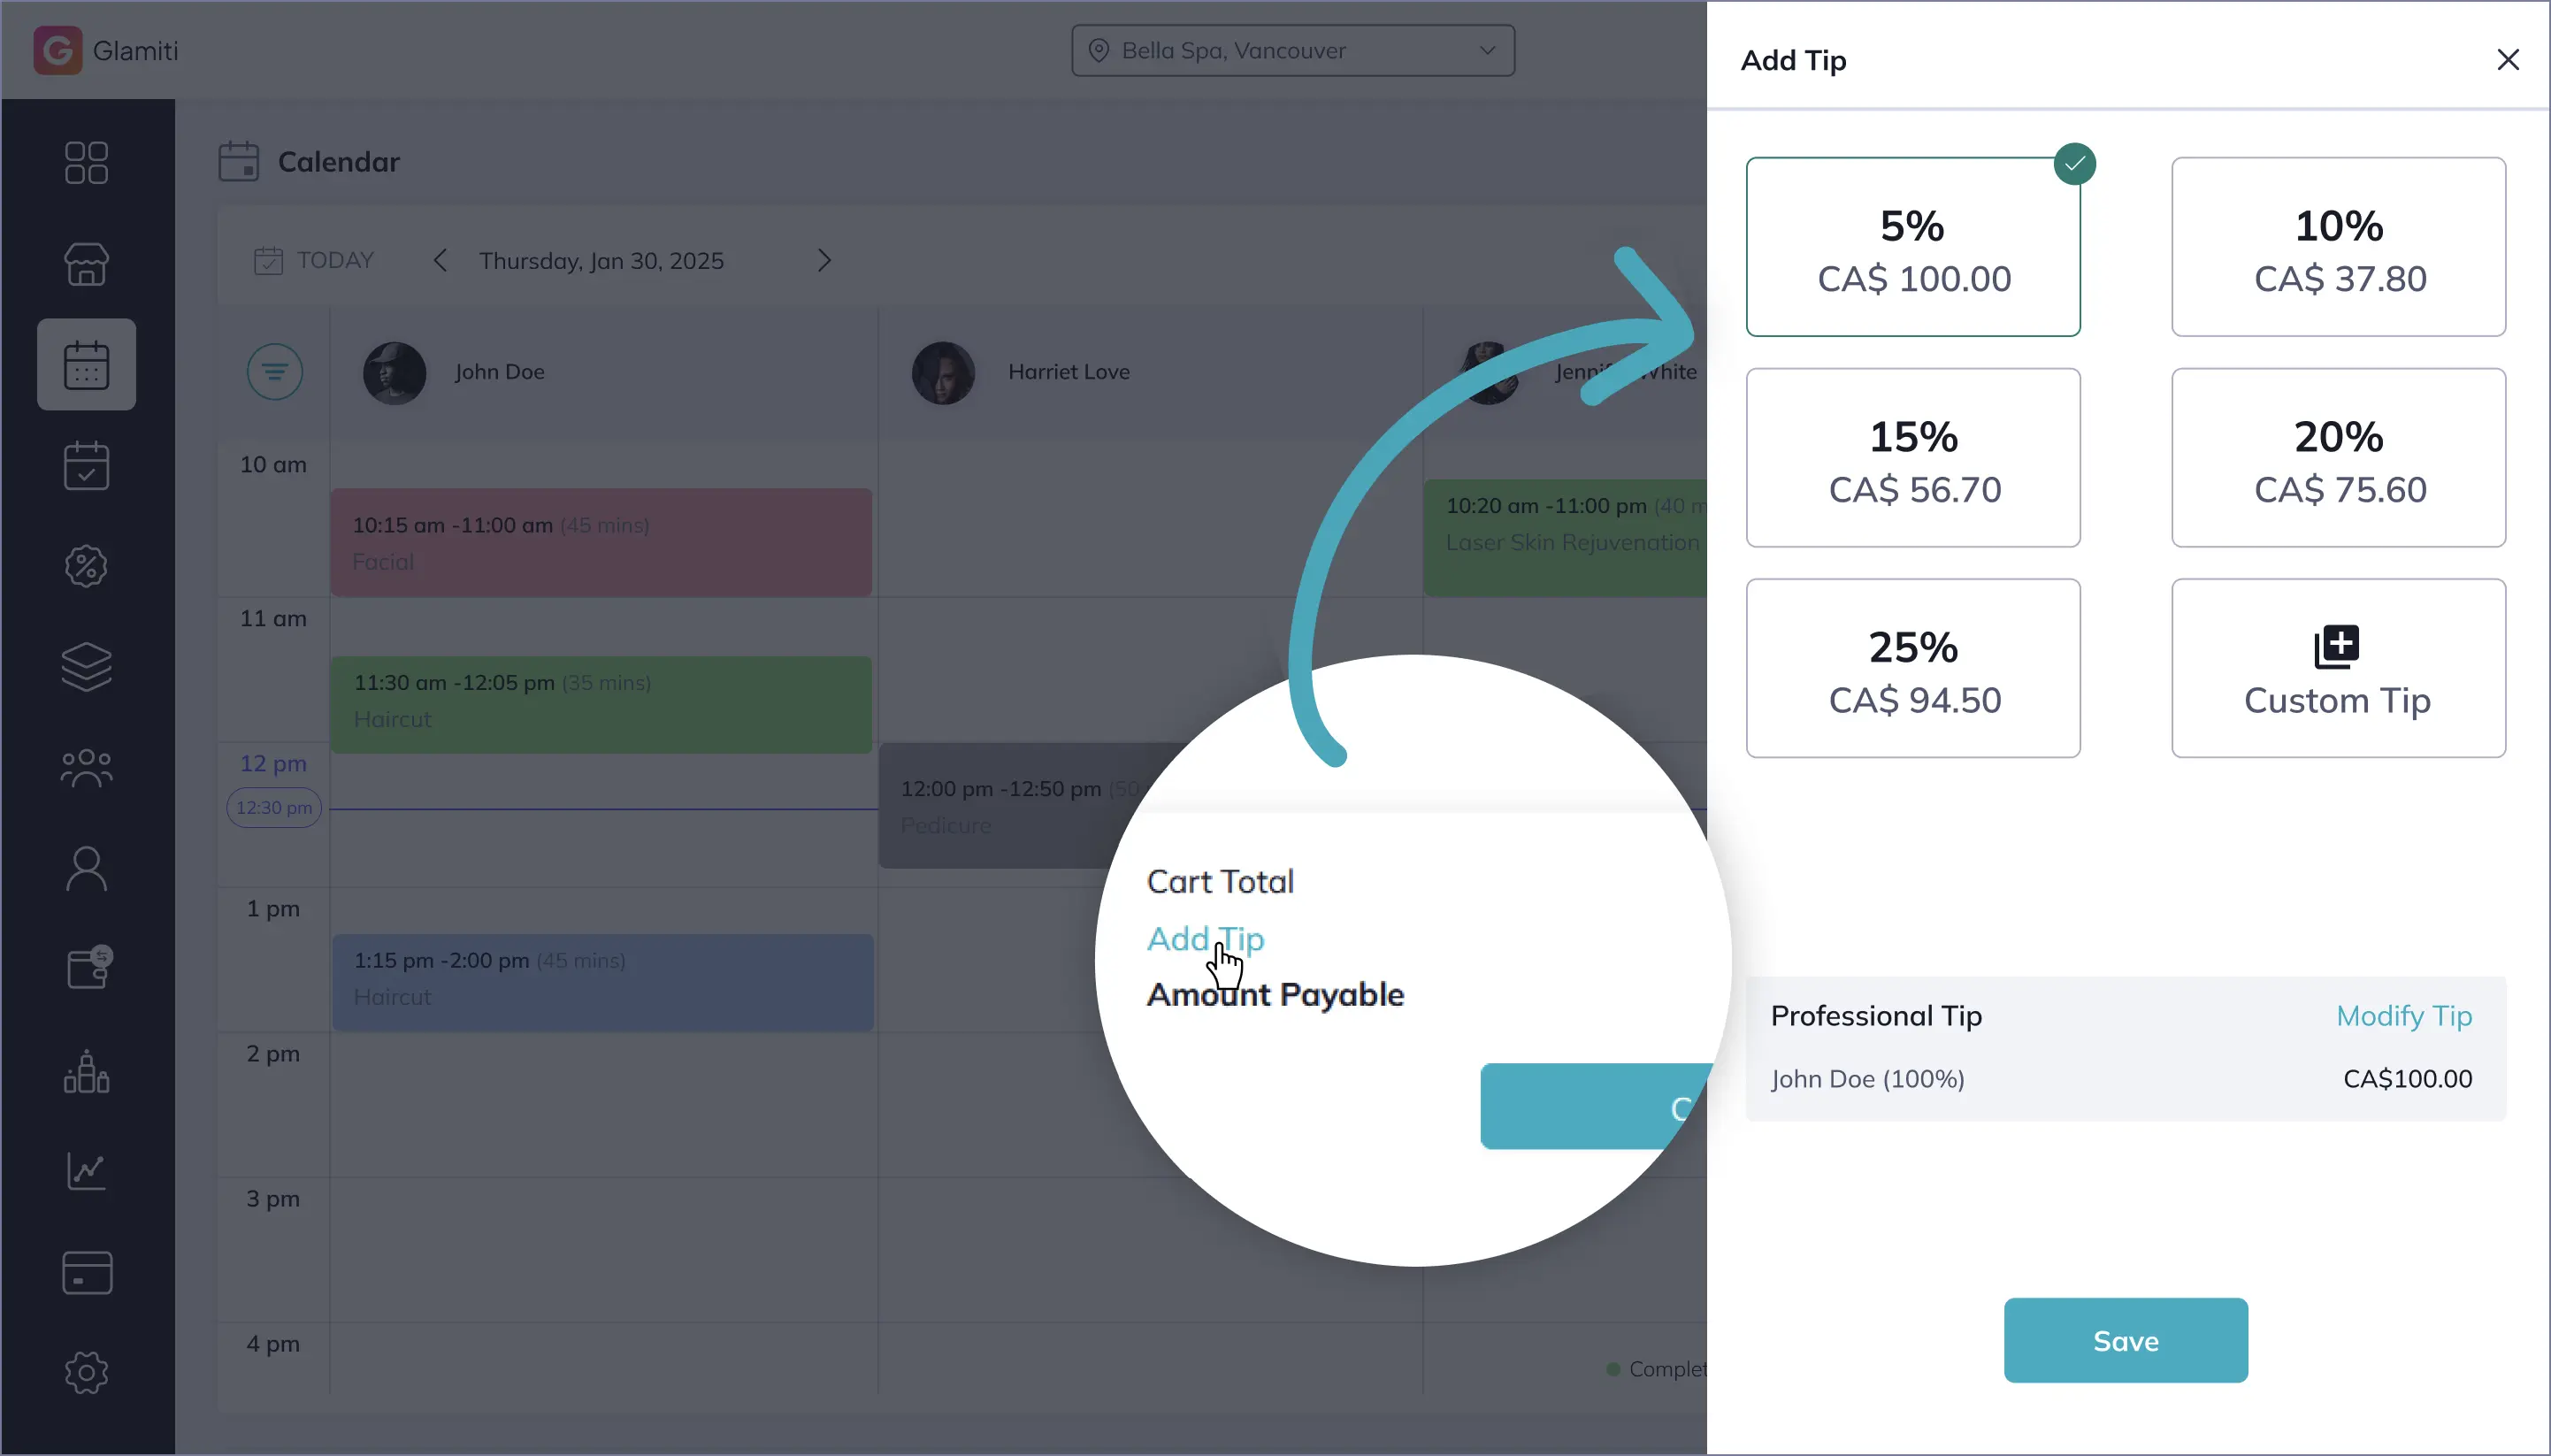
Adding a Tip
Tips can be added during checkout as either:
◦
A percentage of the total amount payable.
◦
A fixed amount.
If multiple professionals are involved in the booking, the tip is distributed among them in proportion to their respective service prices.
Payment Methods
Glamiti offers several default payment options:
Cash
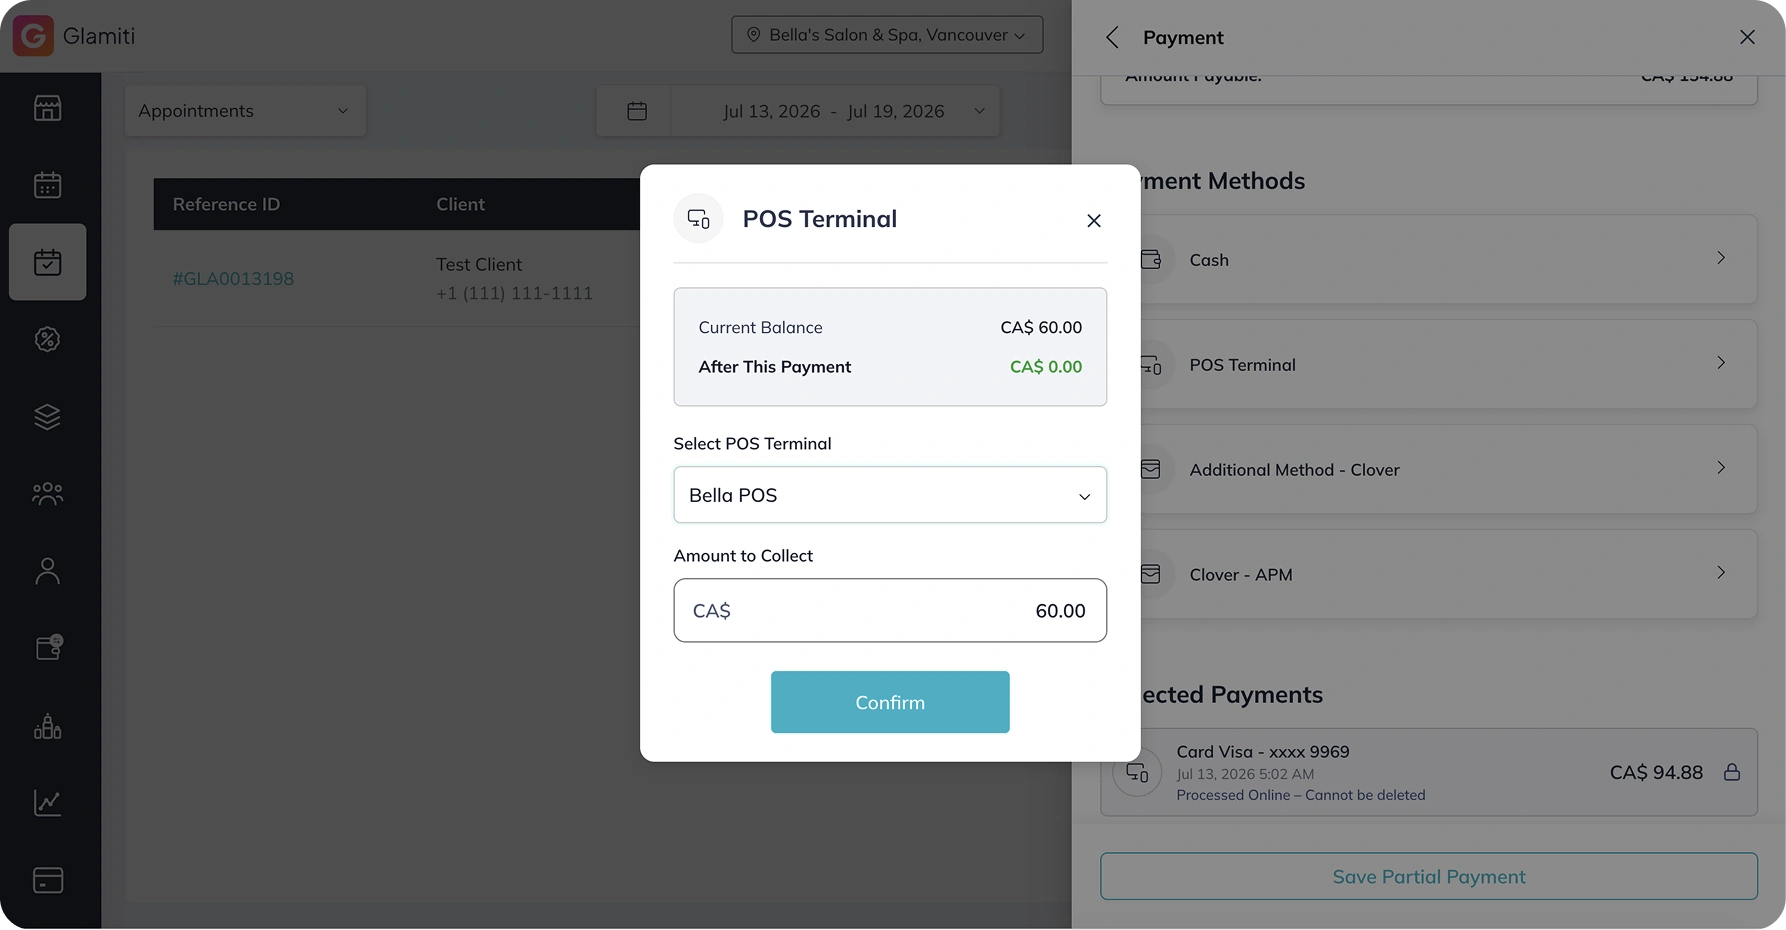
POS (Card Terminal)
(Requires Setup Payment & POS connection)
Saved Cards
(Requires Setup Payment completion)
Tap To Pay
(Requires Setup Payment completion)
Important:
•
The payment methods available at checkout depend on whether you have completed Setup Payment.
•
If Setup Payment is not completed, only Cash will be available.
•
For POS payments, you must complete Setup Payment and connect a POS terminal.
•
Saved cards can be used only after completing Setup Payment.
Split Payments
Introduction
Split Payments allow you to collect one bill through two or more payments.
You can combine different payment methods or use the same payment method more than once.
You can combine different payment methods or use the same payment method more than once.
Split Payments can be completed using
Cash
POS Terminal
(Requires Setup Payment & POS connection)
Saved Cards
(Requires Setup Payment completion)
Tap To Pay
(Requires Setup Payment completion)
Additional payment methods created by the business
Voucher
When a voucher is used, Glamiti automatically applies the available voucher value to the remaining balance.
How to Split a Payment
Step 1 — Start Checkout
Add the services, products, or other items to the appointment or sale and select Checkout.
Step 2 — Collect partial payment
Select a payment method, enter the partial amount, and complete the payment.
The remaining balance will update automatically.
Step 3 — Collect the Remaining Balance
Select a payment method and complete the payment for the remaining balance.
Complete Checkout
Once the remaining balance reaches CA$0.00, select Checkout to complete the transaction.
Refunds
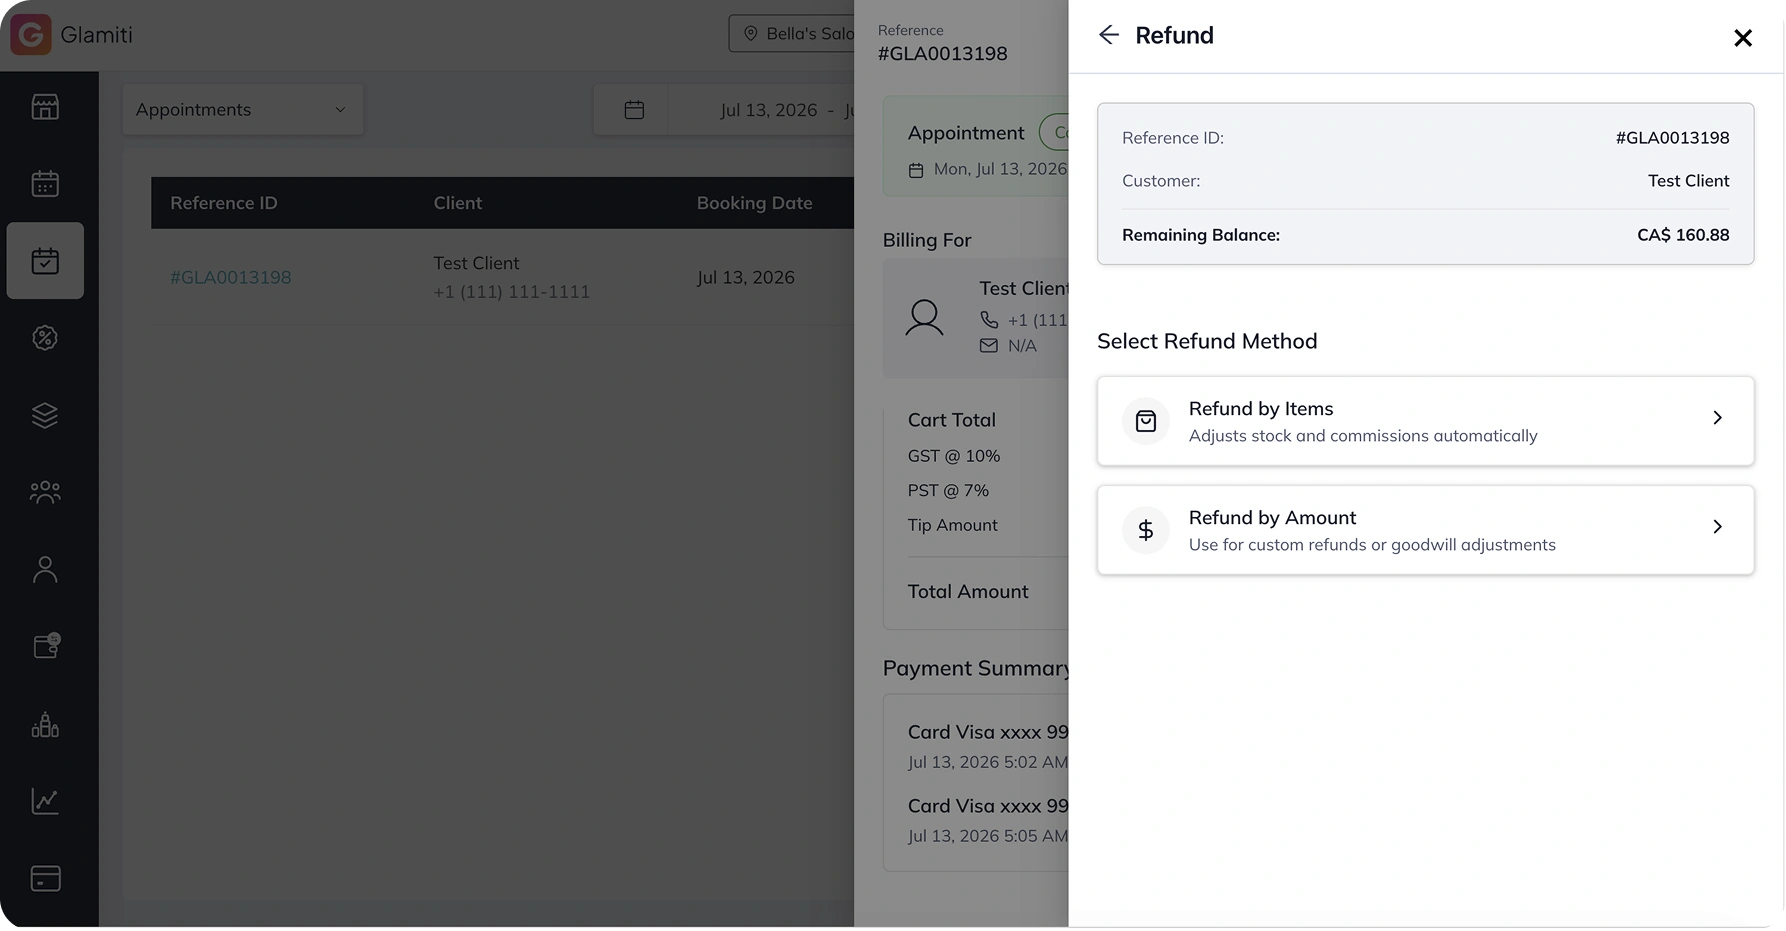
Refunds allow you to return all or part of the payment collected for a completed sale or appointment.
You can process a refund in two ways:
Refund by Item
Refund by Amount
Refund by Item
Use Refund by Item when you want to refund specific items from the sale or appointment.
Select the items you want to refund, and Glamiti will calculate the refund amount automatically.
If a product is refunded, its quantity will be added back to inventory.
Select the items you want to refund, and Glamiti will calculate the refund amount automatically.
If a product is refunded, its quantity will be added back to inventory.
Use Refund by Item when you want to refund specific items from the sale or appointment.
Select the items you want to refund, and Glamiti will calculate the refund amount automatically.
If a product is refunded, its quantity will be added back to inventory.
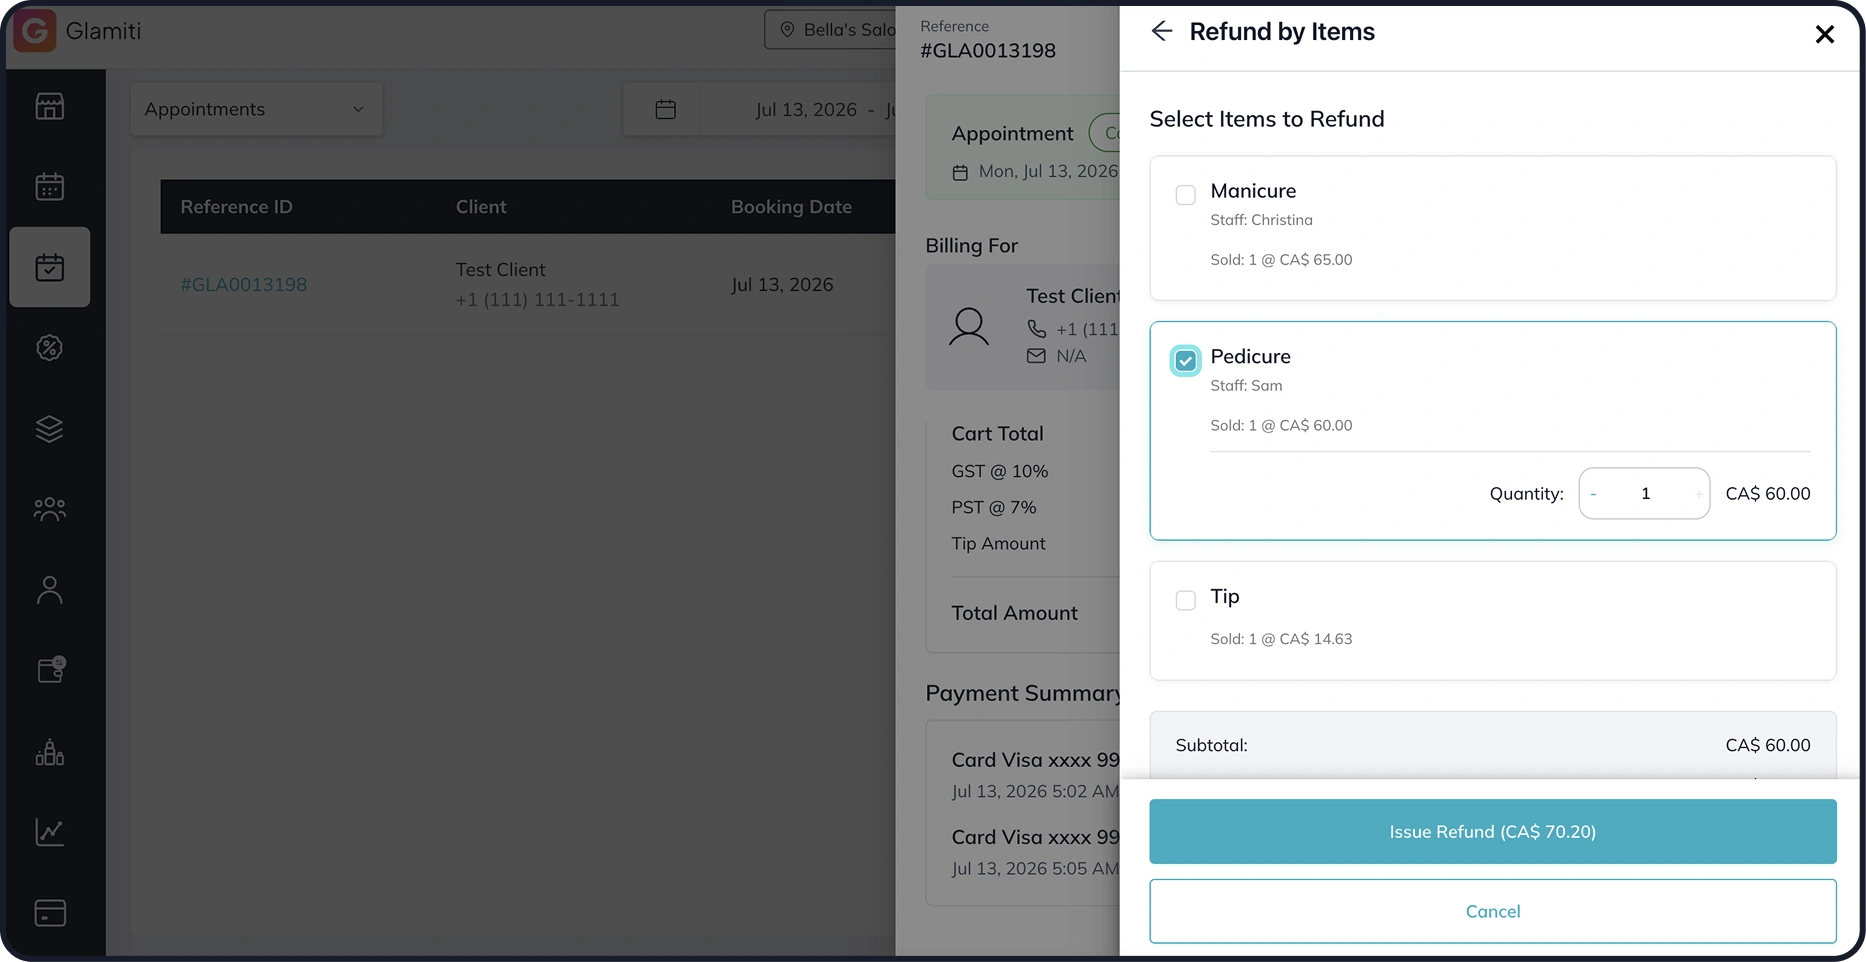
How to Process a Refund by Item
Select Refund by Item
Select Refund, then choose Refund by Item.
Select the Item
Choose the item or items you want to refund.
Review the calculated refund amount.
Review the calculated refund amount.
Select the Payment Method
Select one of the payment methods used in the original transaction.
The selected payment method must have enough refundable balance to process the selected items.
The selected payment method must have enough refundable balance to process the selected items.
Confirm the Refund
Review the refund details and select Confirm Refund.
The refund will be processed through the selected original payment method.
The refund will be processed through the selected original payment method.
Refund by Amount
Use Refund by Amount when you want to refund a specific amount instead of selecting individual items
The refund can be for the full available amount or a partial amount.
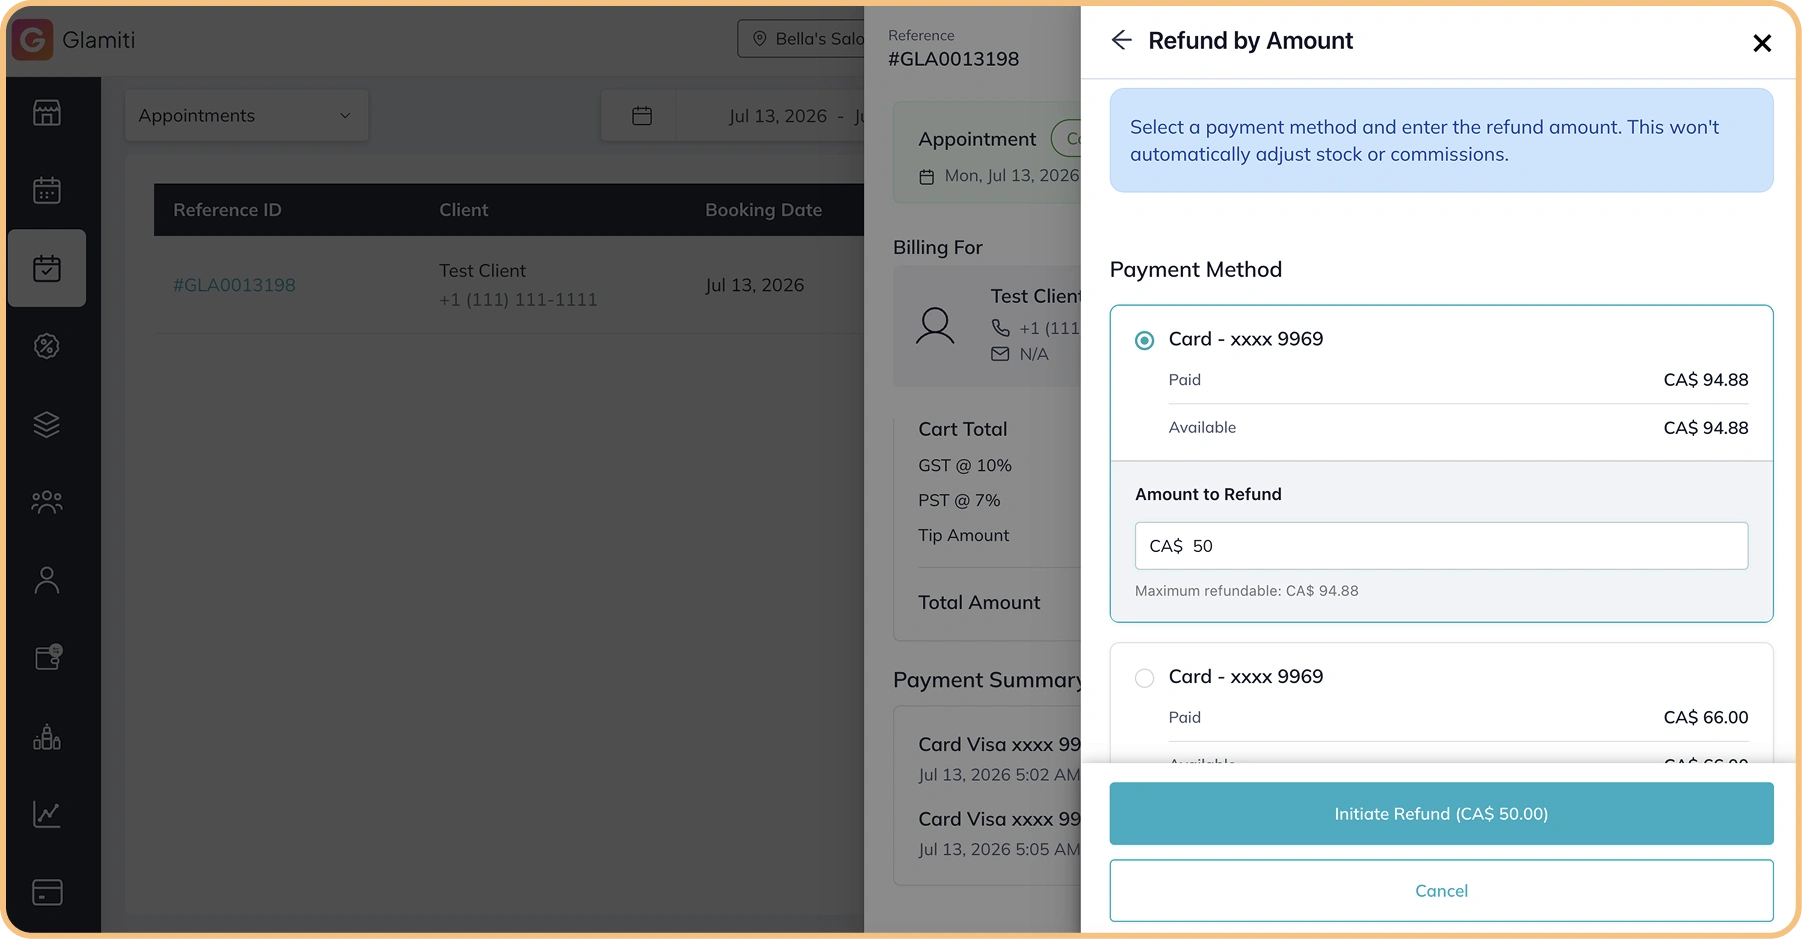
How to Process a Refund by Amount
Select Refund by Amount
Select Refund, then choose Refund by Amount.
Select the Payment Method
Select one of the payment methods used in the original transaction.
Enter the Amount
Enter the amount you want to refund.
The refund amount cannot be greater than the refundable balance available under the selected payment method.
The refund amount cannot be greater than the refundable balance available under the selected payment method.
Confirm the Refund
Review the refund details and select Confirm Refund.
The amount will be refunded through the selected original payment method.
The amount will be refunded through the selected original payment method.
Important to know:
•
Refunds can be processed only after the complete payment has been collected.
•
Refunds are returned through a payment method used in the original transaction.
•
Refund by Item automatically returns refunded products to inventory.
•
Amount that's Redeemed from vouchers cannot be refunded.
•
Clients can pay using a previously purchased voucher.
•
This option is only available for registered clients who have an existing voucher.
•
"Guest" clients cannot use vouchers for payment.
Additional Payment Methods
•
As a business owner, you can add custom payment methods through the Settings.
•
These added methods will be displayed on the checkout page for selection.
Sending Receipts
Overview
The Send Receipt feature provides a convenient, eco-friendly way to deliver receipts via Email or SMS. Glamiti offers two methods for this: an automated system for your registered clients and a manual option to instantly send a receipt for any transaction. You can manage your automatic receipt settings at any time in your Business Settings.
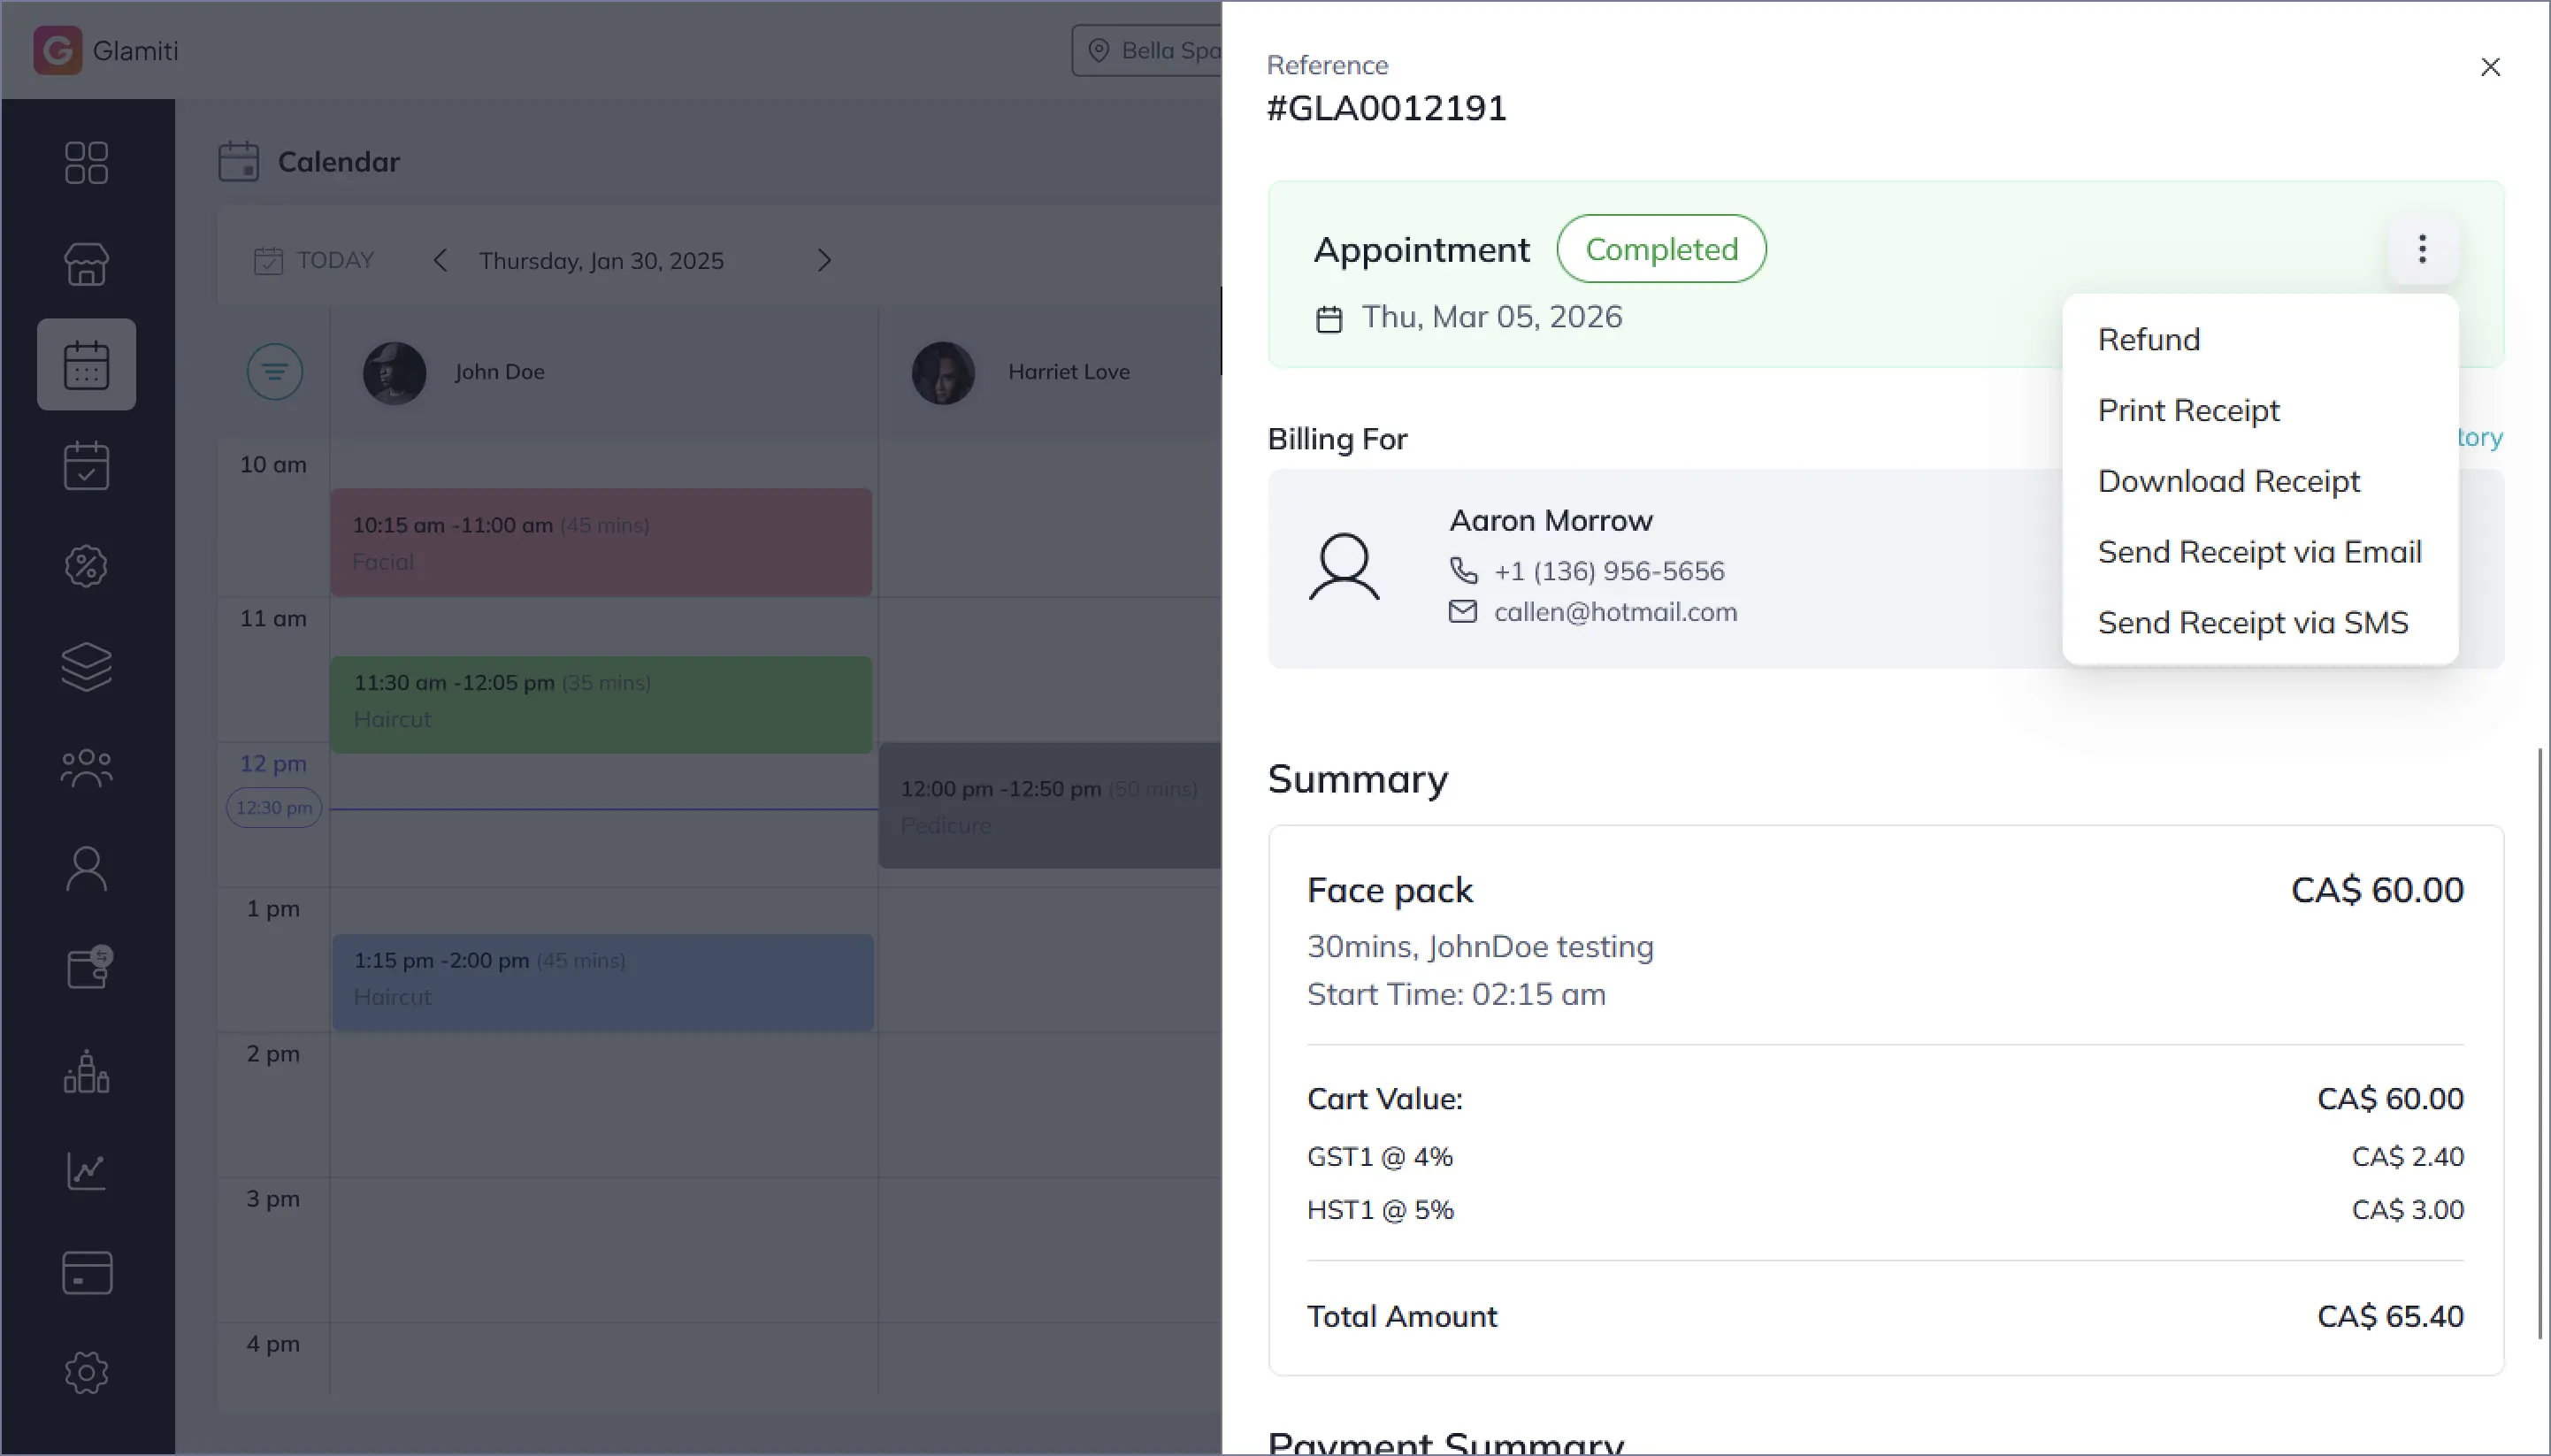
Automatic Receipt Sending
Glamiti can automatically send receipts to ensure your registered clients are always kept up-to-date.
For more details, go to
Manual Receipt Sending
Manually send a receipt for any transaction. This is the perfect way to provide a receipt to a 'Guest' or walk-in customer, or to resend a copy to a registered client who requests one.
How to Send a Receipt Manually
1.
Navigate to the specific Booking, Appointment, or Sale detail screen.
2.
Click the More options button to open the action menu.
3.
Select one of the following options:
◦
Send Receipt via Email
◦
Send Receipt via SMS
4.
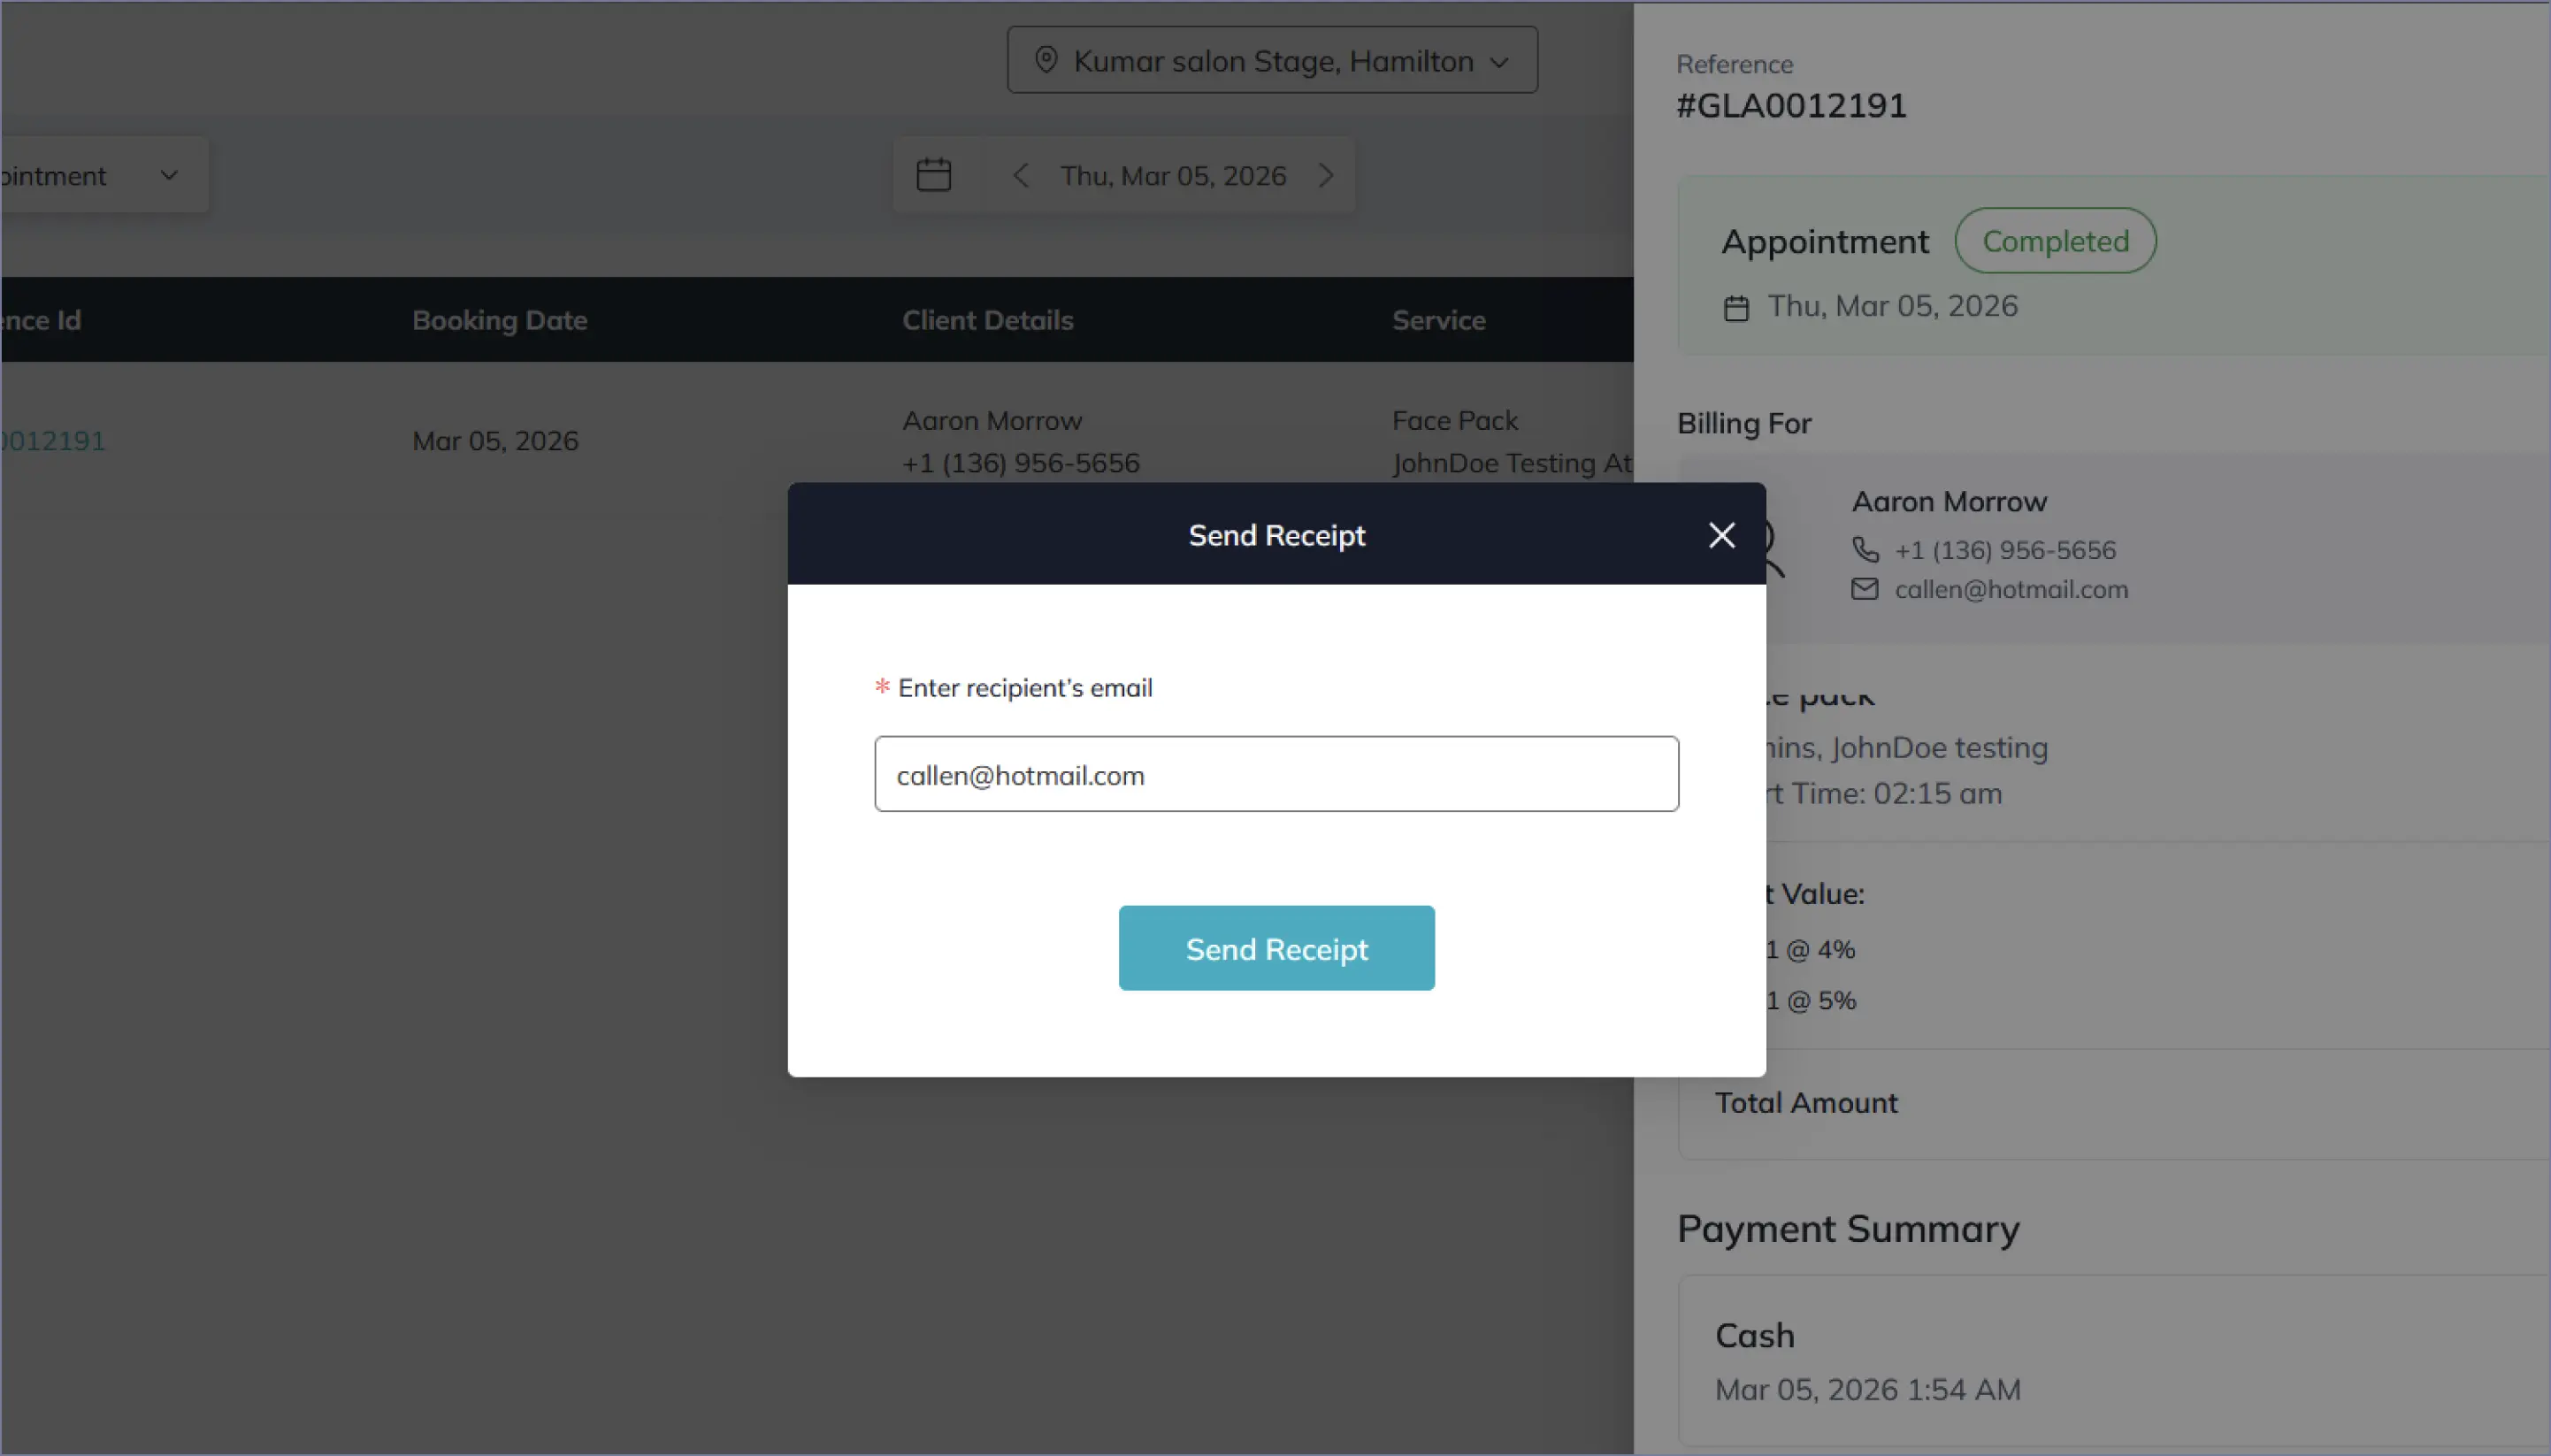
A pop-up window will appear. Enter any email address or mobile number.
5.
Click Send.
What Your Client Receives:
If a client or guest requests a receipt, follow these steps:
Email:
The recipient receives a full, detailed receipt in their inbox.
SMS:
The recipient receives a text message with a secure link to view and download their receipt.